This is Scott Jabbour of SJ Woodshop holding the finished guitar. It started as a blank kit: a block of wood, a neck, and hardware. Twelve build stages later, this is what came out.
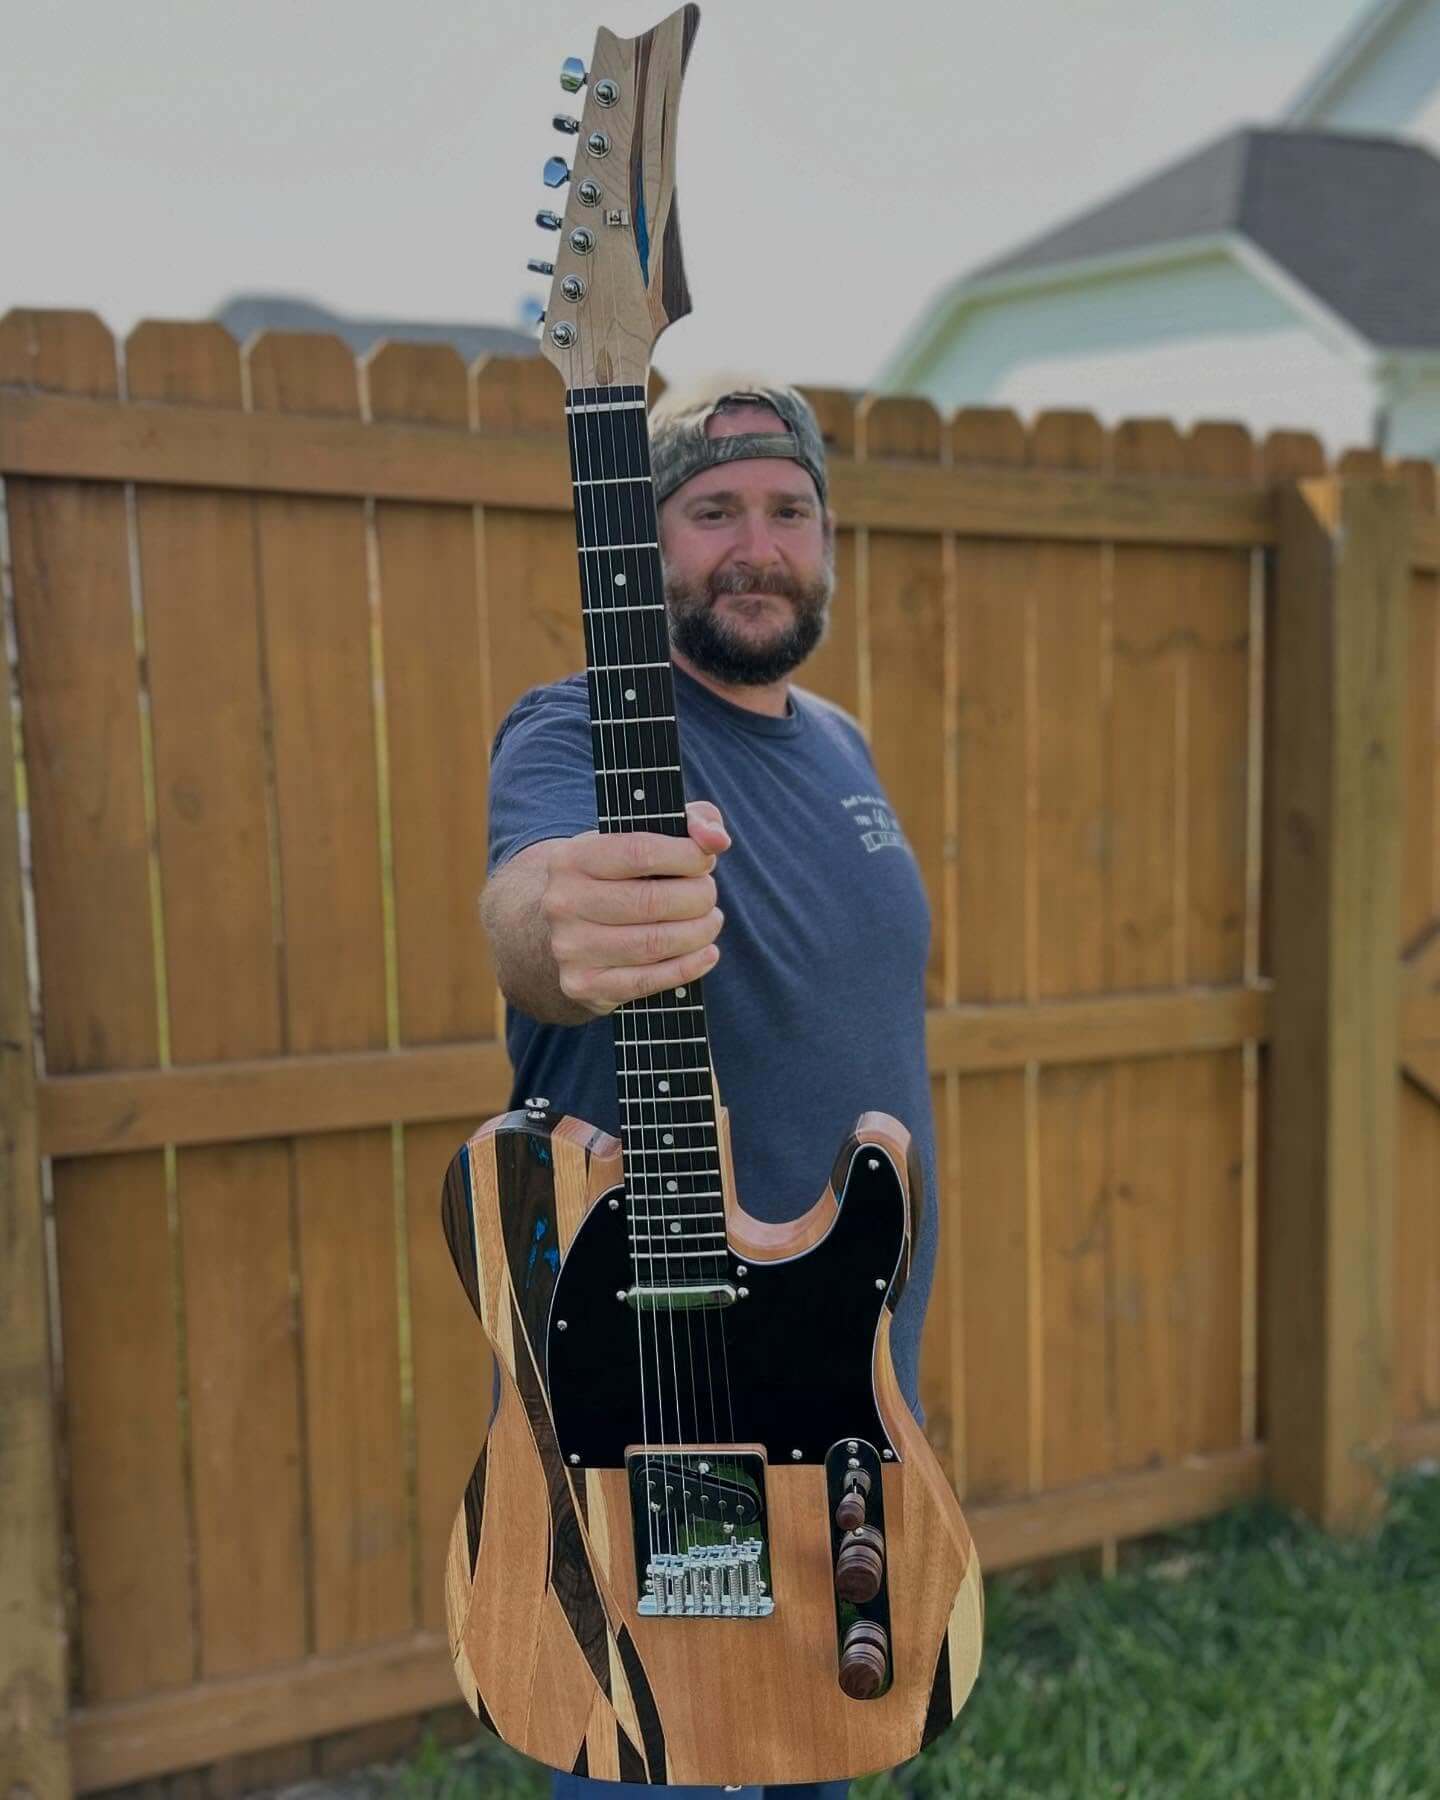
When Scott picked up one of our Blank TE-Style Guitar Kits, he did not just assemble it. He turned a block of wood into a signature instrument. He cut and re-glued the body with contrasting stripes, turned his own knobs on the lathe, laser-engraved his shop logo into the back, and built a custom wall hanger to display it.
This was his first guitar build. Look what happens when a skilled woodworker takes on a blank kit.
Follow Scott: @scottjabbwoodshop
Scott’s craftsmanship, precision joinery, and willingness to experiment are exactly what blank kits are designed for. Go subscribe to his Instagram. His work deserves the audience.
The build journey, stage by stage
Every clip below is a 15 to 60 second look at one stage of Scott’s process. Watch them in order for the full story, or jump to whichever stage you are working on in your own build.
Stage 1: Unboxing the kit
Before the glue, cuts, and polish, it all starts with a box. Scott unboxes his TE-style kit and walks through every component.

Stage 2: Shaping the body
With the custom blank fully cured, Scott brings out the power tools to cut the iconic body shape and sand the contours. This is one of the most satisfying stages, where a block of wood truly starts to look like a guitar.

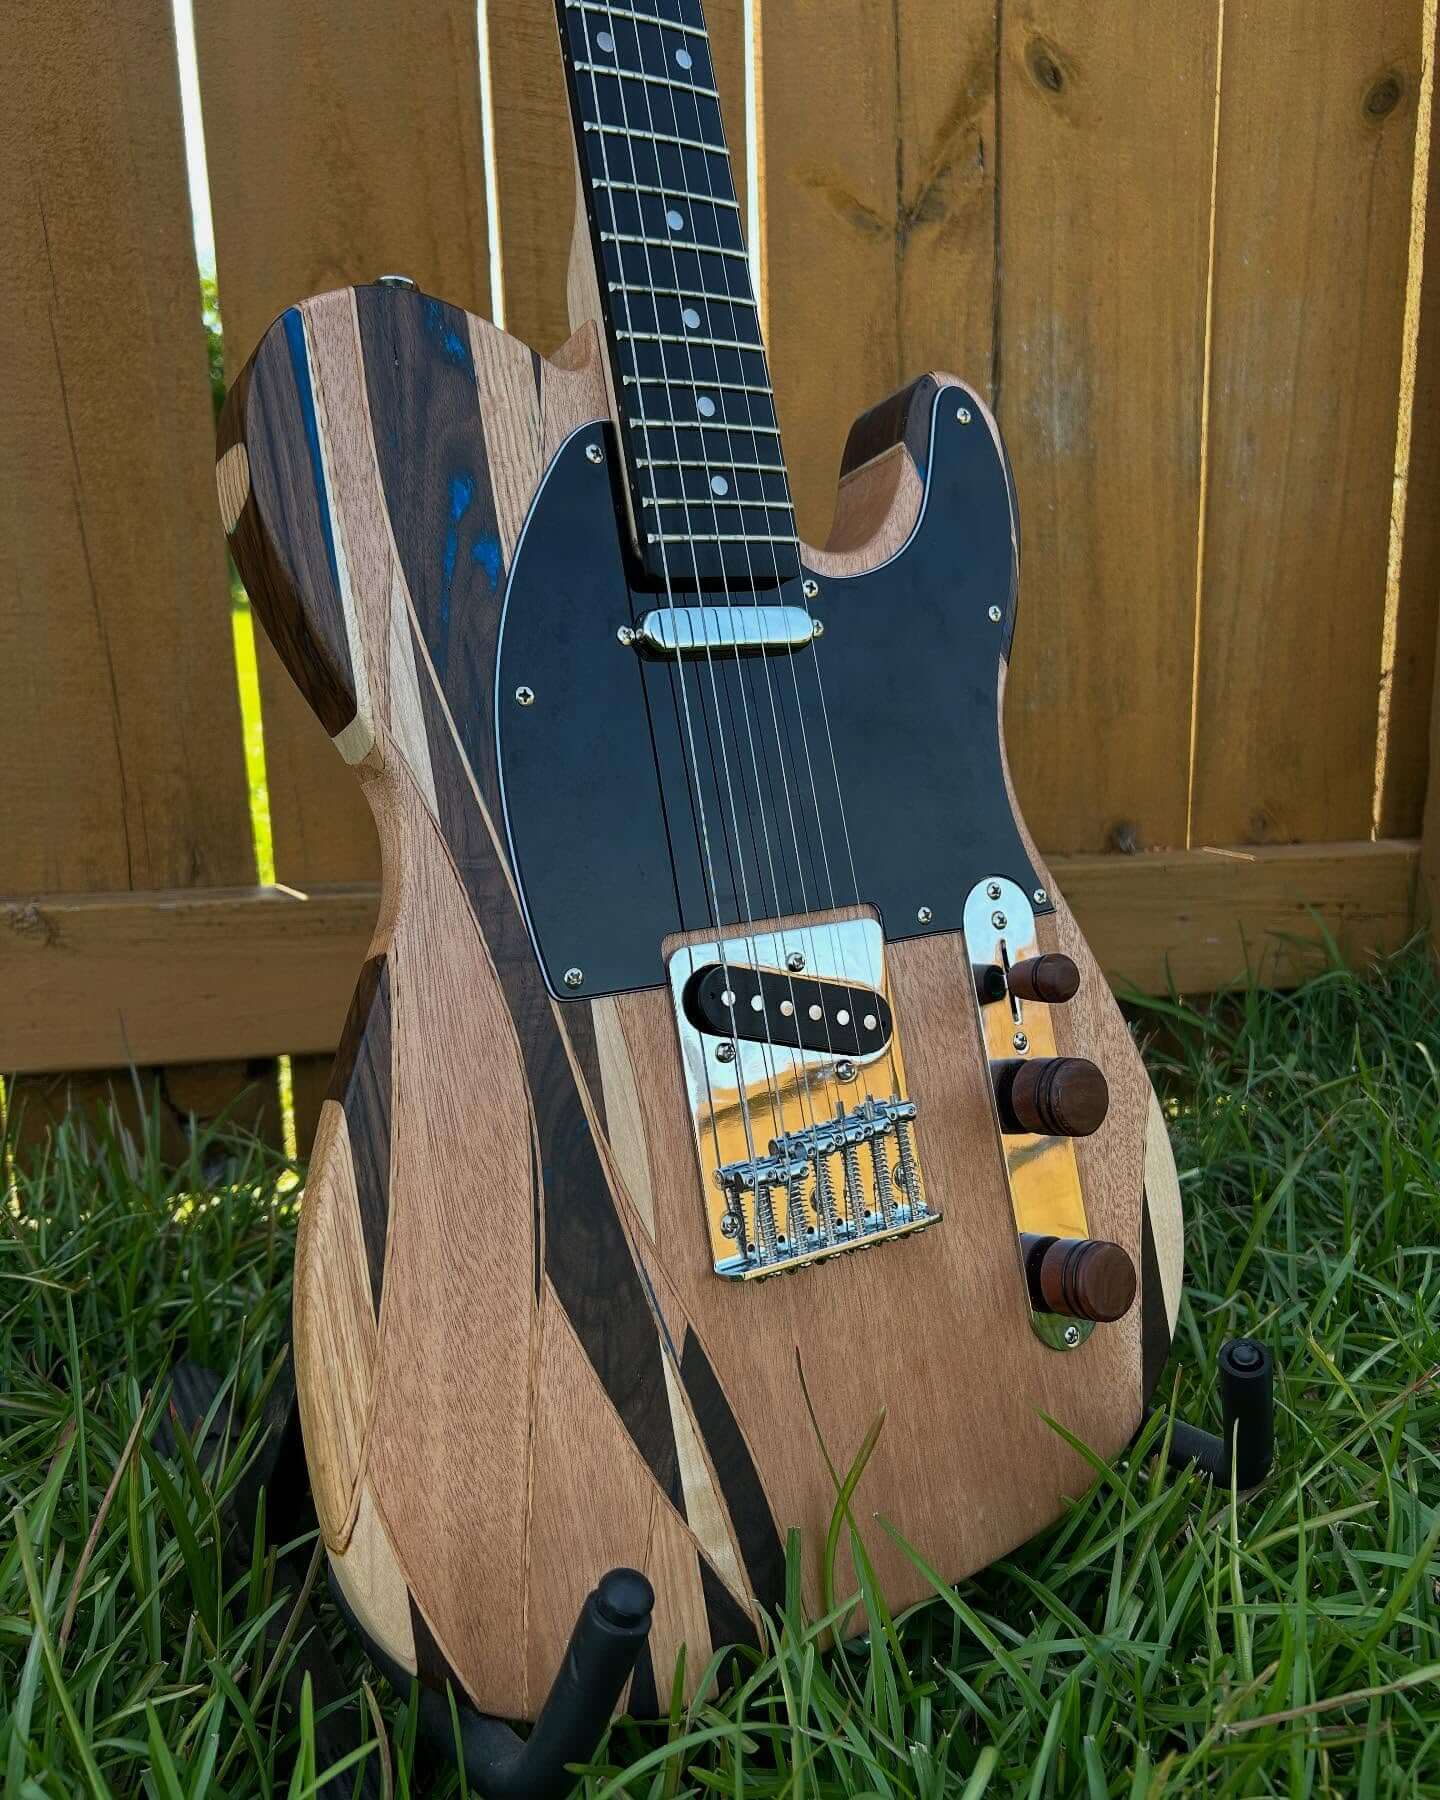
Stage 3: Creating the striped look
This is where the customization begins. Scott takes the blank body concept to the next level by cutting, gluing, and clamping contrasting wood to create the striking striped effect his guitar is known for. Required real precision joinery and a willingness to experiment.

Stage 4: Turning custom knobs
Instead of reaching for standard plastic knobs, Scott turns his own on the lathe, matching the aesthetic of the wood body. This level of detail is what elevates a kit build into a signature instrument.

Stage 5: Drilling the output jack
Since Scott started from a blank kit, he had to drill the output jack hole himself. A brief look at the technique.

For a deeper dive on jack installation, see the Jack install FAQ.
Stage 6: Buffing out the final lacquer coat
Scott uses craft paper to buff out his final coat of spray lacquer. A small trick that gives the finish that glassy, polished look.

Stage 7: Connecting the bolt-on neck
Scott installs the neck and shares a great tip: always hand-screw the neck bolts to avoid stripping out the holes. Attention to detail like this is why the final build feels so solid.

Stage 8: Installing the pickguard
The assembly process kicks off as Scott carefully aligns and installs the pickguard. The custom woodwork and classic hardware start to come together.

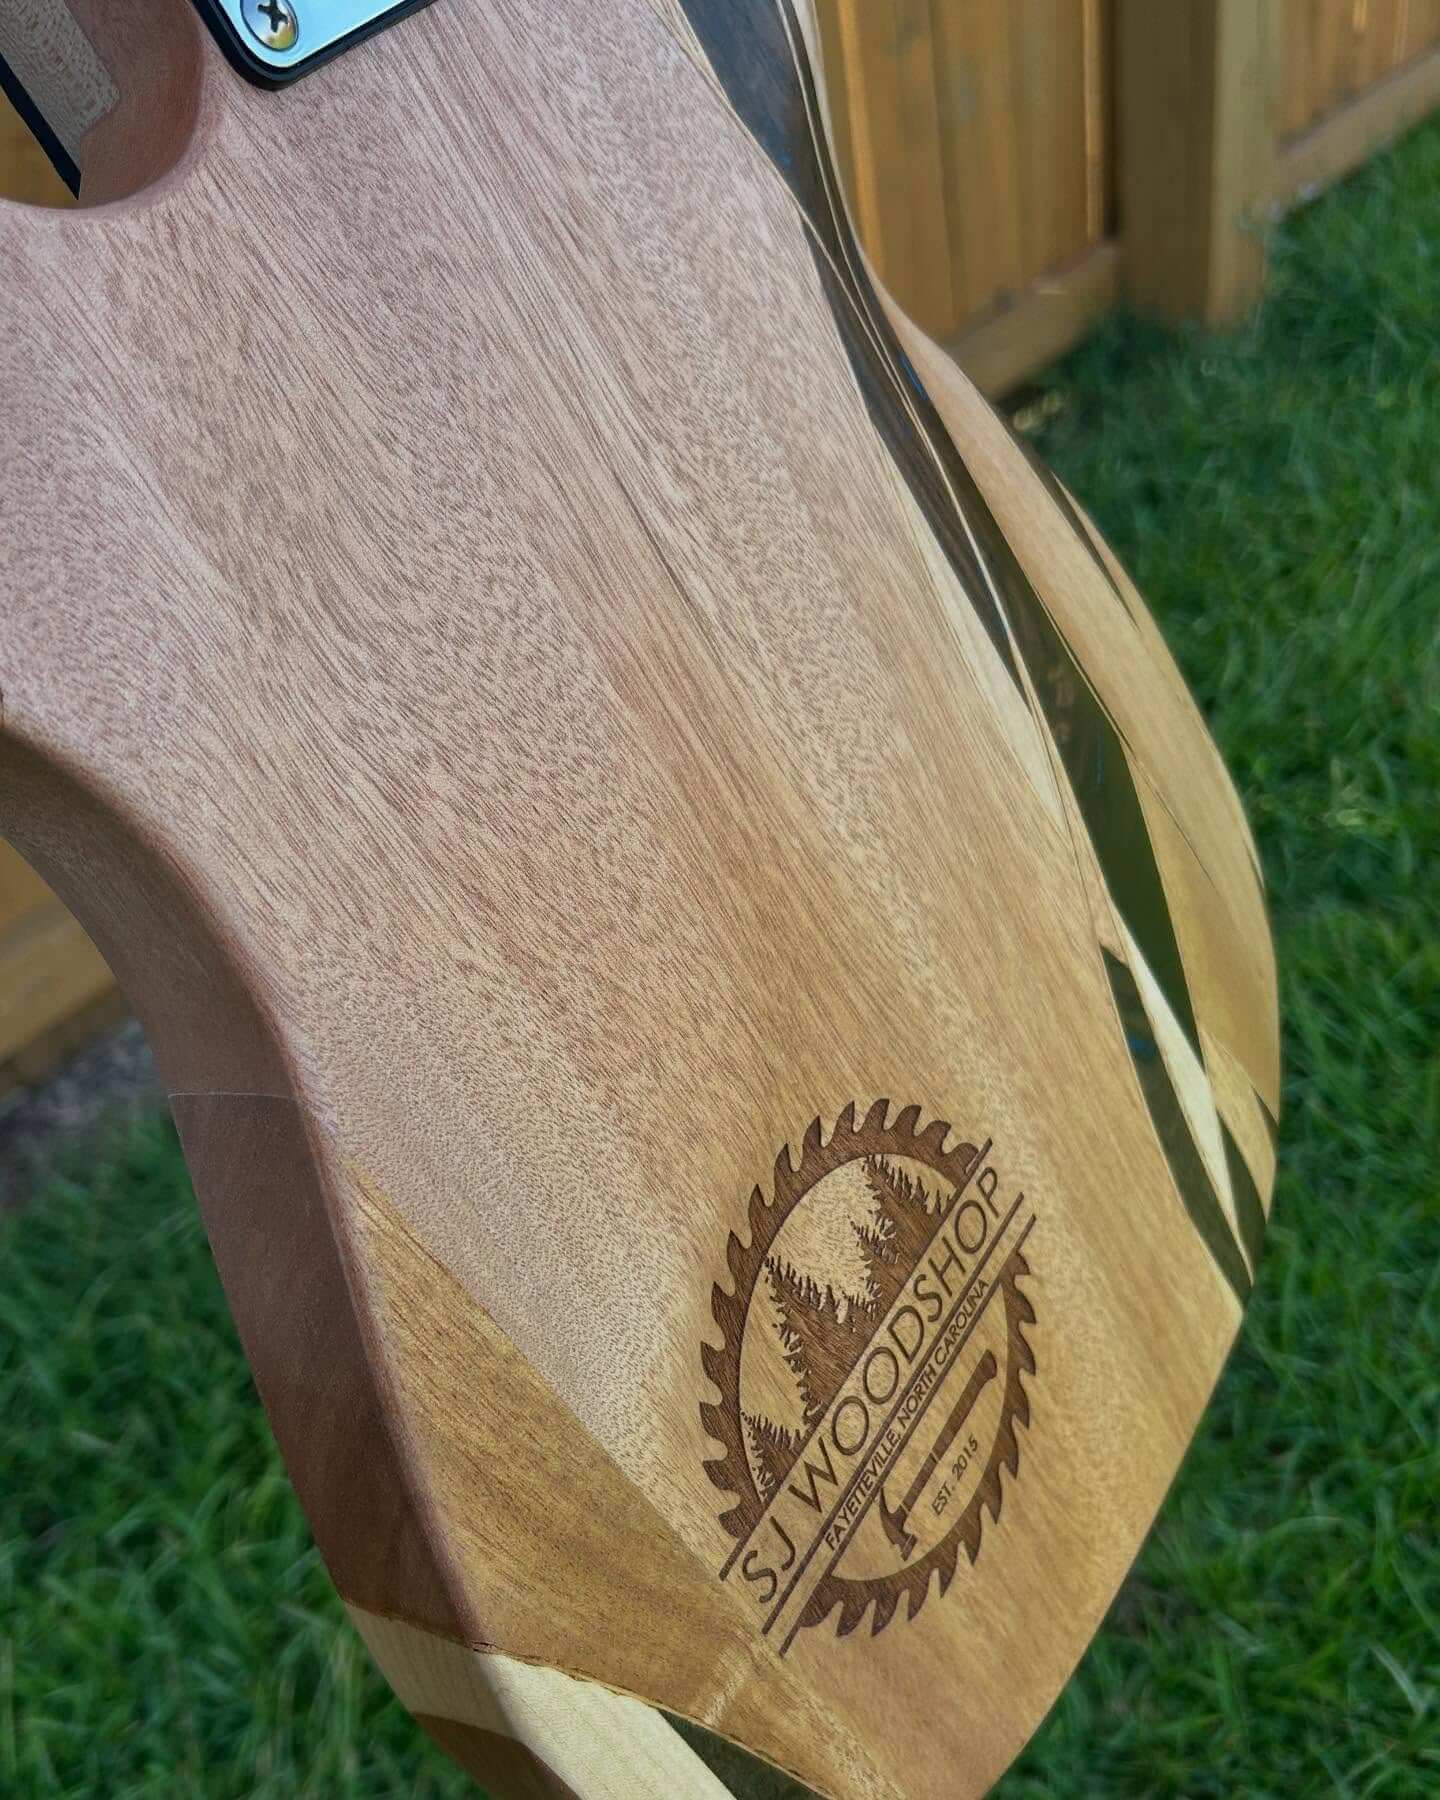
Stage 9: Laser engraving a custom logo
To make it official, Scott uses a laser engraver to burn his SJ Woodshop logo into the back of the guitar body. A sharp, personal signature on a one-of-a-kind instrument.

Stage 10: Final wiring and assembly
In the final build episode, Scott tackles the electronics, soldering the connections and installing the bridge, control plate, and neck. The custom guitar is now fully assembled and ready for setup.

Stage 11: The finished guitar
It looks and sounds incredible. See and hear the completed instrument in action.

Stage 12 (bonus): A handmade wall hanger
With the guitar complete, Scott adds the perfect finishing touch: a handmade wooden wall hanger to display his build. A fitting final step for a project defined by care and craftsmanship.

Read the full story
The complete write-up of Scott’s build, including his reflections and more photos, is on the GKW blog:
Scott’s First DIY Guitar Build
Follow Scott
Scott documents his woodworking projects, guitar builds, and shop life on Instagram. If you enjoyed this build, go follow him:
@scottjabbwoodshop on Instagram
Inspired to build your own?
Scott started with a blank DIY kit. No paint, no finish, no pre-drilled jack hole. Just a canvas. If you have some woodworking skill and want full creative control over your guitar, a blank kit is where you start.
Browse our Blank DIY Guitar Kits collection.
If you are newer to building, one of our pre-finished kits is a great entry point with less setup and more immediate results. Either way, every kit becomes something different in the hands of a builder.