A neck that wobbles in its pocket, sits off-center, or leaves the action too high is one of the most common things builders write in about, and almost all of it comes down to fit and alignment. The good news is that a loose pocket and a crooked neck are fixable at home with thin shims, a straightedge, and some patience. This guide helps you find the real cause first, then correct it without harming the wood.
Applies to: Bolt-on and set-neck kits of any body shape, where the neck seats into a pocket. Neck-through builds have no joint to shim, so this does not apply to them.
Find the cause
Work out what is actually wrong before you touch a tool. Match your symptom below, then jump to the fix.
| Symptom | Likely cause | Go to |
|---|---|---|
| Neck rocks or wobbles side to side in the pocket | Pocket cut slightly wide, or the wood has shrunk | Fix 1 |
| Visible gap along one or both pocket walls | Same, often seasonal wood movement | Fix 1 (also Fix 5 if it came with dry weather) |
| Outer strings run off the edge of the fretboard, or the string path drifts to one side | Neck sitting off-center | Diagnose, then Fix 1 |
| Action stays too high with the bridge saddles at their lowest | Neck angle too shallow | Fix 2 |
| Bolt-on neck screws spin or will not pull tight | Screw holes stripped or widened | Fix 3 |
| A crack in the heel, the pocket, or the body near the joint | A knock, or a big humidity swing | Fix 4 |
| A gap that opened up after a dry spell or a move | Low humidity, the wood contracted | Fix 5 |
Diagnose before you fix
Never shim or drill until you know what is wrong. Three quick checks tell you almost everything.
First, mark your centerlines. Lay a strip of masking tape down the center of the body and the center of the neck heel, then pencil a line on each. This gives you a reference you can trust while you work.
Check centering with taped-on strings. Sight down the neck from the nut toward the bridge; the center line of the neck should run straight to the center of the bridge. For an exact check, tape the low E and high E strings in their playing positions, from the nut out over where the bridge will sit. Look at the gap between each outer string and the edge of the fretboard. If the neck is centered, that gap is even on both sides and both strings land cleanly on the outer bridge saddles. If one side is tighter, the neck is off-center. That spacing should stay matched along the whole neck, not just at the nut.
Check the neck angle with a straightedge. With the bridge in its position, lay a steel ruler (at least 40 cm, about 16 in) flat along the fretboard and run it out over the bridge. When the bridge is seated, the ruler should just clear the top of the saddles, which leaves room to set a playable action later. If the ruler buries into the saddles or floats well above them, the angle needs correcting (Fix 2).
Measure the gap. Slide a feeler gauge into the loose spot to see how much play you are dealing with. A gap around 0.2 mm (about 0.008 in) is tiny and needs only the thinnest veneer. Gaps under 2 mm (about 1/16 in) sometimes close up on their own once finish is applied.
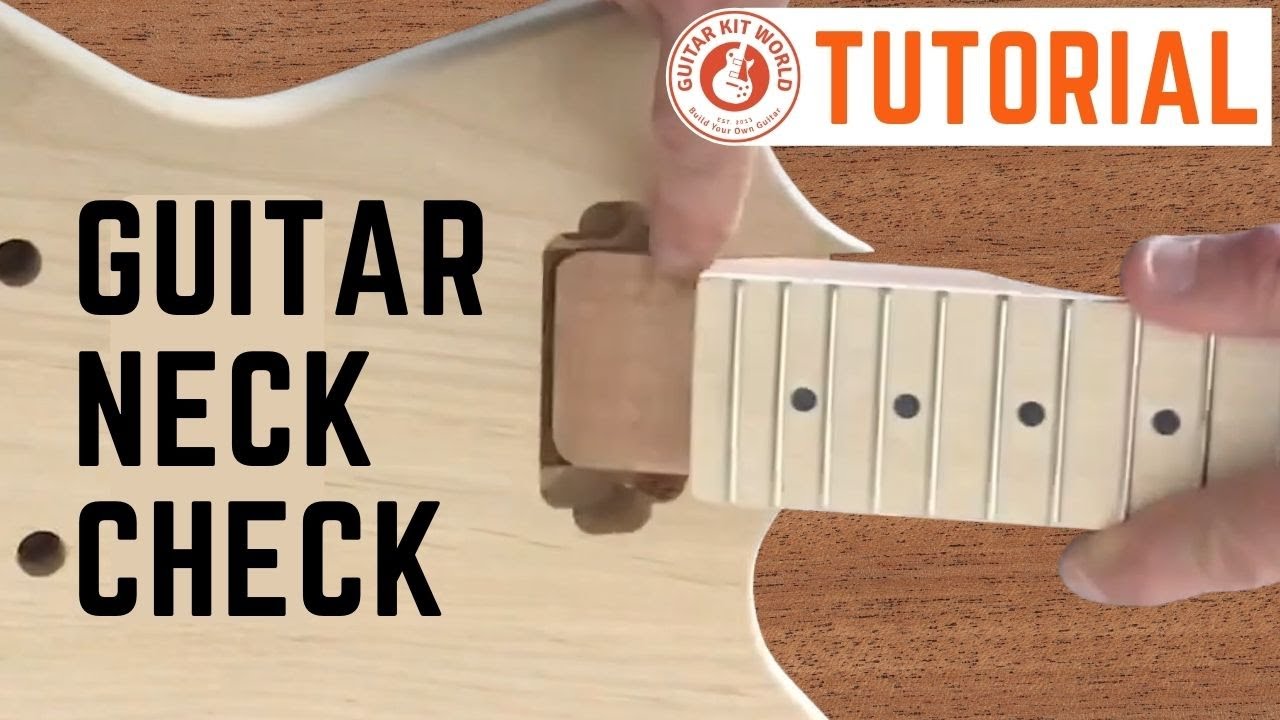
See what a careful dry-fit looks like, seating the heel first so you never chip the pocket edges:
And here is how to check alignment and neck angle step by step:
Fix 1: Shim a loose or off-center pocket
This is the fix for a neck that wobbles, shows a side gap, or sits off-center. Remember one rule: side shims cure side-to-side play, and a bottom shim only changes the angle. For looseness, fix the walls, not the floor.
Choose your shim material. Use hardwood veneer, ideally the same species as the body, though maple is fine on any kit. Hardwood keeps solid contact and helps sustain, where a loose pocket kills it. Business cards or tape are okay for a temporary test-fit only, never as the permanent fix.
Cut the shims. Trace the pocket wall contour onto the veneer with a pencil, then cut just outside the line to allow for the blade width. For a plain wobble, cut two equal shims, one per wall, so the neck stays centered. For an off-center neck, shim the loose side more (or only that side) to walk the centerline back, then re-check with the taped strings. A single-side shim shifts the centerline, so use it deliberately and verify.
Glue the shims to the pocket, never to the neck. Use PVA wood glue and bond the shims to the pocket walls, which is the body cavity, so a bolt-on neck stays removable. Never glue a shim to the neck heel. On a set-neck, these side shims become part of the permanent joint and go in before you glue the neck.
Fit and fine-tune. Sand any protruding shim flush after the glue cures. Dry-fit the neck; it should need light hand pressure to seat, not hammering. If it is too tight, sand the shims evenly a little at a time and re-check often. For a hairline 0.2 mm gap, two ultra-thin veneers, one per side, usually do it, aiming for a gentle press-fit.
Pro tip: Fillers are cosmetic, not structural. Epoxy or CA glue mixed with sawdust will hide a tiny void, but it will not stop a wiggle. Use veneer shims for any real looseness, and save the filler for hairline cosmetic gaps only.
Fix 2: Angle shim when the action stays too high
If your action is still too high with the bridge saddles at their lowest, the neck angle is too shallow. A thin shim laid across the bottom of the pocket at the heel end tips the neck back and brings the action into range. This changes tilt only, so it will not cure side play.
Cut a thin shim, with a slight taper, to sit across the heel end of the pocket floor. On a bolt-on, that bottom shim can stay loose and floating, which keeps it reversible: loosen the screws, drop it in, and re-tighten. On a set-neck, glue the shim to the body pocket floor, never to the neck heel, and only before the neck is glued in. Shim in small steps and re-check the straightedge each time, because a little goes a long way. For the full angle and install detail, see the neck module linked at the bottom.
Fix 3: Re-drill stripped bolt-on screw holes
If the neck screws spin without biting or will not pull the joint tight, the holes have widened. Do not force longer or fatter screws in, since that only splits the wood further.
Plug the holes first. Coat one or more hardwood dowels, or plain wooden matches or toothpicks, with PVA glue and press them into each stripped hole. Let the glue cure fully, overnight is safest, then trim the plugs flush.
Re-drill a fresh pilot hole. Drill roughly two-thirds the thickness of the screw’s threaded core, deep enough to guide the screw without splitting the wood. On softer timbers such as mahogany or basswood, drill shallower so the threads still bite. Wrap masking tape around the bit as a depth stop so you cannot drill through. Then drive the screws by hand in a cross pattern until firm, and do not overtighten.
Fix 4: Glue and clamp a cracked heel or body
Humidity swings and knocks can open a crack in the heel or in the body near the joint. Small cracks repair well at home.
First decide whether the crack runs all the way through the body, because a through-crack needs support and clamping from both sides.
Clean the crack. Run a scalpel or a thin blade along it to clear out dust and grit, then wipe with warm, soapy water and let it dry. Glue will not bond through dust.
Fill it. For a fine crack, collect sawdust from your own guitar, work it into the crack with a gloved finger, then run water-thin CA glue in with the applicator or through a straw. Add a second layer of sawdust on top and let it set. For a shallow crack, a tinted wood-fill epoxy worked in with a putty knife (gloves on while mixing) is a good alternative.
Clamp without crushing. Do not over-tighten. The clamp’s only job is to hold the body stable while the glue does the work, not to force the crack shut. Place a flat caul, a scrap of flat timber, wherever a clamp touches the wood so it never bites in. For a curved or contoured area, an elastic strap (an occy strap) or a ratchet tie-down spreads pressure better than a rigid clamp. Once it has cured, scrape or sand the excess flush and check that the fill matches the surrounding wood tone.
Fix 5: Close a humidity gap and prevent the next one
Wood is hygroscopic, which means it takes on and gives off moisture with the air. When humidity drops, the body and the neck heel lose moisture and shrink, which is why a pocket that fit perfectly can loosen over a dry winter.
Acclimate first. Before you shim anything, leave the kit unboxed in your build room for at least 24 to 48 hours, and 48 to 72 hours in extreme or very different climates, so the wood settles to the room. A gap that opened up may partly close on its own. Only fit and drill once the wood has settled.
Hold a stable climate. Aim for 45 to 55 percent relative humidity (40 to 55 percent is a safe band) and 18 to 24 C (65 to 75 F). A small hygrometer lets you watch the room. Keep the guitar out of garages, attics, and basements, and away from windows, exterior walls, heaters, and air conditioners. Seasonal case humidifiers or desiccants help hold the range. If a real gap remains after the wood has acclimated, shim it as in Fix 1.
When to stop and ask
Take your time, and do not force anything. If a shim will not bring the neck snug, if a crack is large or structural, or if a part looks wrong or is missing,
Questions, or is something not going to plan? Comment below this tutorial with clear photos and we will help you right here. Your question and the answer then help the next builder too.
If you have a Guitar Kit World kit and the issue is with the kit itself, such as a missing or damaged part, email our support team at [email protected]. Include the email address you used for your purchase, your order number, and a couple of photos, and the team will get you sorted out quickly.
Start Here: Find Your Build Manual
For the full neck fit, centering, and install detail, see the Neck Installation universal module.