Sooner or later a screw strips, a hole ends up a hair off, or a bridge post works loose. None of that means your build is ruined. This guide walks you through the standard fixes: filling a small hole so a screw bites again, plugging and re-drilling a hole that landed in the wrong place, re-seating a loose bushing or post, and drilling the new hole straight so it holds for good.
Applies to: any wood-screw or press-fit hole on a bolt-on or set-neck kit, including bridges (hardtail, wraparound, and Tune-O-Matic), tuners, strap buttons, pickguards, control plates, and neck plates.
Find the cause
Start here. Match your symptom, then jump to the fix.
| Symptom | Likely cause | Go to |
|---|---|---|
| Screw spins in place and never tightens, or backs out under load | Threads have chewed out the wood, so the hole is now oversized | Fix 1 |
| Screw, bridge, or strap button sits off center and the holes do not line up | Hole was drilled or placed in the wrong spot | Fix 2 |
| Tuner bushing or bridge post wobbles and will not stay put | A press-fit hole has opened up or was slightly too wide | Fix 3 |
| Bridge post or stud leans forward once the strings are on | Post seat has loosened and the hole has enlarged | Fix 3 |
Every one of these ends the same way: you drill a fresh, straight hole. Read the last section before you pick up the drill.
Fix 1: A stripped screw that spins
This is the most common kit hiccup, and the fix is simple. It works for small hardware screws: strap buttons, tuners, pickguards, control plates, and jack plates.
- Back the screw all the way out.
- Squeeze a little wood glue (standard yellow PVA woodworking glue) into the hole.
- Push in a few wooden toothpicks or plain wooden matchsticks (no glue, no sulfur heads) until the hole is packed snug. Coat them in glue as they go in.
- Snap or trim them off flush with the surface.
- Let the glue cure. A few hours works, but overnight is safest.
- Drill a fresh pilot hole through the new wood (see Drilling the new hole straight), then drive the screw back in by hand.
You have given the screw fresh wood to bite into. Do not over-tighten it, or you will strip the new plug too.
Pro tip: Turn every hardware screw with a hand screwdriver, not a power driver. Kit screws are soft and small, and a power tool strips or snaps them in an instant.
Fix 2: A hole in the wrong place
When a hole landed off position, or a stripped hole is too far gone for toothpicks, plug it completely with a hardwood dowel and start over. This same method fixes misaligned bolt-on neck-plate holes, and it can be used anywhere on the guitar that needs a hole patched or covered.
You will need hardwood plugs or dowel rods that match your body wood, wood glue, a drill with a brad point bit, a flush-cut saw or chisel, 220-grit sandpaper, clamps, and calipers or a ruler.
- Clean the old hole with a 1/4 inch (about 6 mm) brad point bit so the walls are fresh, round, and true. Match your dowel to that size.
- Cut a dowel to length and sand it lightly so it slides in without forcing.
- Spread wood glue on both the dowel and the inside of the hole. Push the dowel in flush and clamp it if you can.
- Let it dry overnight. Do not rush this step.
- Trim the dowel flush with a flush-cut saw or a chisel, then sand it smooth with 220-grit.
- Reposition the hardware over the plugged spot. For a bridge, drop the center screw in loosely and measure equal spacing from the guitar’s center line before you mark the outer holes.
- Mark the new spot and re-drill it in the correct position (see Drilling the new hole straight).
On a bolt-on neck, there is a second option if one plate hole sits awkwardly: finish the join with washers instead of the backplate. Drill a slightly larger counterbore about half a centimeter (roughly 5 mm) deep so the washer seats flush, then bolt the neck. This works best with threaded inserts.
Fix 3: A loose bushing or leaning post
Tuner bushings and bridge posts are press-fit, not screwed. When one wobbles or a post leans, the hole has opened up slightly. String tension will pull a crooked post forward, so square it up before it gets worse.
- For a small amount of play, remove the bushing or post, wipe a thin film of wood glue around the hole wall, and press the part back in square. Wipe away any squeeze-out right away.
- If a wraparound stud or bridge post leans and the hole is clearly enlarged, treat it like a misplaced hole: plug it with a dowel and re-drill to the correct diameter (Fix 2).
- Hold the post vertical while the glue sets. A post that cures leaning will fight you forever.
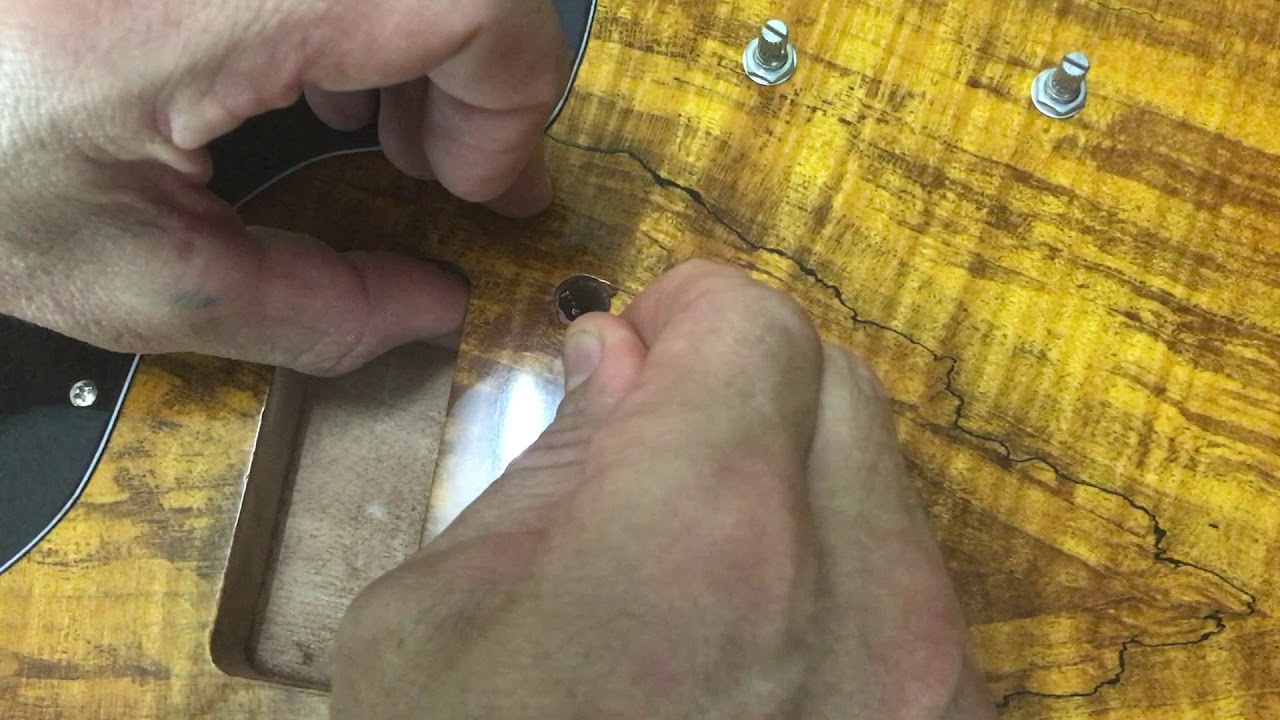
Here is a wraparound bridge going in, so you can see how the posts seat and where the ground wire sits underneath them.
Drilling the new hole straight
Every fix above ends here. A clean, straight, correctly sized hole is what makes the repair hold.
- Mark the exact spot, then make a small starter dent with a center punch or a nail. That dent keeps the bit from wandering as it bites.
- Pick a bit about two-thirds the thickness of the screw’s threads.
- Drill to about two-thirds of the screw’s depth. Go a little shallower still in soft woods like mahogany or basswood so the threads keep their grip.
- Wrap a flag of masking tape around the bit at that depth so you stop in the right place and never drill through the body. Measure the tape against only the part of the screw that actually enters the wood.
- Keep the drill perpendicular. Sight it against a small square, or check it by eye from two directions.
A few extras that make the difference:
- Self-aligning bit: For bridge outer holes, a self-aligning bit (also called a snappy bit) drops into the hardware’s own countersink and centers itself, so the new hole lines up with the part.
- Wax the threads: Rub each screw thread with a little candle wax or beeswax before driving it. The screw glides into hard wood and is far less likely to snap or strip.
- Protect the finish: On a painted body, lightly bevel the top edge of the pilot hole with a larger bit turned by hand so the screw threads do not lift and chip the paint.
When to stop and ask
If the wood around a hole is split or crumbling, or a bridge post hole is so enlarged that a dowel will not seat, stop before you make it worse. Post a photo in Builder Q&A and we will talk you through it, or
Questions, or is something not going to plan? Comment below this tutorial with clear photos and we will help you right here. Your question and the answer then help the next builder too.
If you have a Guitar Kit World kit and the issue is with the kit itself, such as a missing or damaged part, email our support team at [email protected]. Include the email address you used for your purchase, your order number, and a couple of photos, and the team will get you sorted out quickly.
Start Here: Find Your Build Manual
For related steps, see the neck installation module, the final setup module for dialing the guitar in afterward, and the painting, finishing, and bridge installation masterclass for bridge mounting in detail.