This is a complete, beginner-friendly guide to building a 24-fret superstrat electric guitar kit with a monkey-grip handle cutout, a bolt-on neck, an HSH pickup layout, and either a double-locking tremolo or a fixed bridge with a string-through tailpiece. If you have searched for how to build a superstrat guitar kit or want a clear DIY guitar kit assembly walkthrough, you are in the right place. You do not need to be a professional woodworker. Take your time, read each section fully before you start it, and enjoy the process.
Difficulty: Intermediate to Advanced
Build time: 20 to 40 hours of hands-on work, plus curing time for your finish
Kit: 24-Fret Superstrat Guitar Kits
Deep-dive modules (universal references that go deeper than any single manual):
Finishing and painting · Neck installation · Wiring and soldering · Final setup
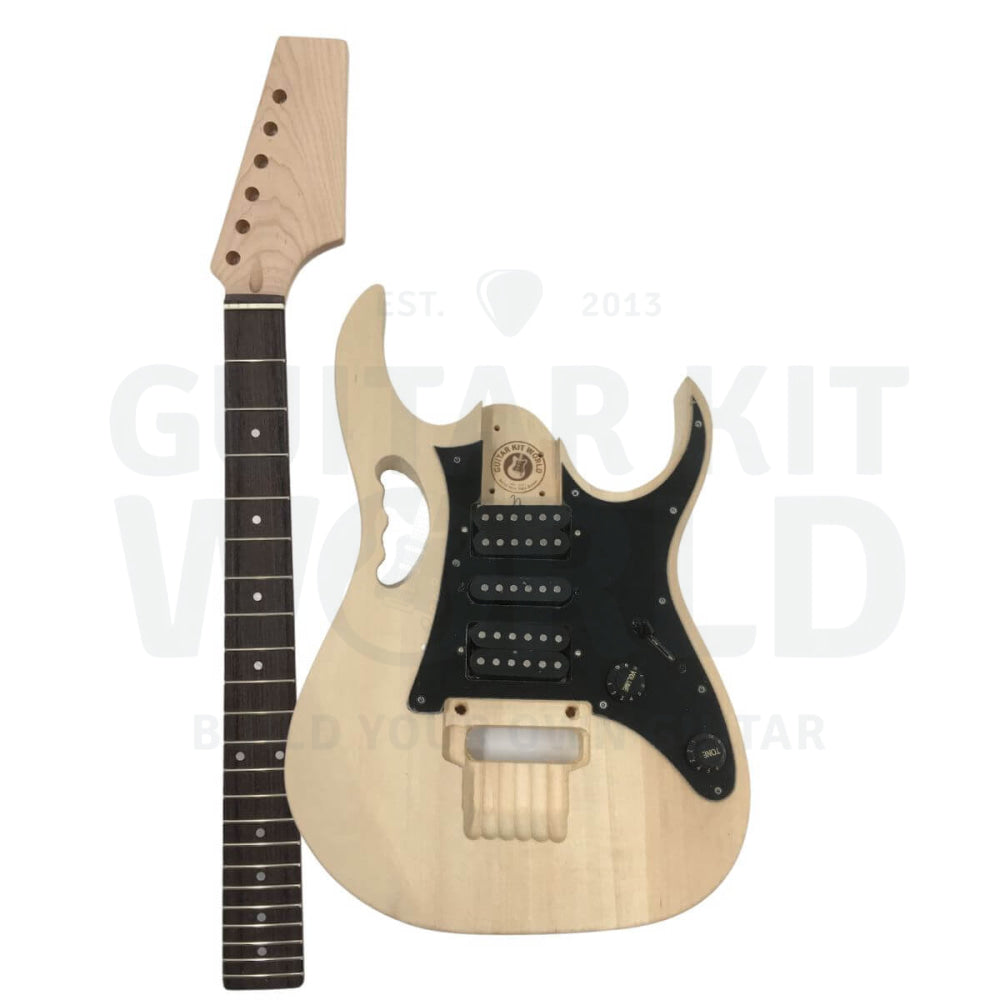

What’s in the box
Your exact contents can vary by model, so check them against your product page. A typical 24-fret superstrat kit includes:
- Prepped superstrat guitar body with the monkey-grip handle cutout
- Completed neck (24 frets, bolt-on)
- Pickguard (some models do not have a pickguard)
- 2 x strap buttons
- 6 x six-in-line tuners for a 6-string guitar, or 7 x tuners for a 7-string guitar
- Bridge: either a double-locking tremolo, or a Tune-O-Matic with a string-through tailpiece
- 1 x volume and 1 x tone control
- 1 x 5-way toggle switch
- Input jack
- Cable and hex wrench (for adjusting the truss rod)
- Tone and volume knobs
- Assorted screws and washers
Tools you’ll need
- Electric jigsaw or coping saw
- Steel ruler (at least 40 cm)
- Hard sanding block
- Center punch
- Electric drill and assorted drill bits
- Large and small screwdrivers (Phillips head and flat head)
- Pliers (needle nose preferably)
- Soldering iron
You will also want solder and a damp sponge for the wiring stage, plus sandpaper, your chosen finish, and safety gear.
How this build works
There are four stages to building a quality kit guitar. Read this whole guide once before you pick up a tool, then work through the stages in order:
- Preparation and finishing (the surface appearance of your guitar, such as staining, painting, or a hand-rubbed oil finish)
- Hardware installation
- Connecting the electronics
- Final setup
Safety first
Set up your safety gear before you sand, finish, or solder.
- Use protective safety glasses or a genuine face shield, not regular prescription, reading, or sunglasses.
- Use disposable gloves if you are applying stains or oil finishes directly to the guitar.
- Use an N95 rated dust mask for sanding and an R95 rated particle mask for finishing.
- Make sure your work space is well ventilated, especially when finishing, to prevent a build-up of potentially toxic fumes.
- Soldering irons get very hot. Solder does not melt until it reaches 185°C (365°F), and irons can reach 392°F to 896°F. Keep the tip away from yourself, your bench, and your cables.
Section 1: Inspect your kit and prepare the wood
Once you have unboxed everything, carefully inspect the body and neck under good light. Identify problem areas early, before you start the project. Look for:
- Large dents that require filling
- Deep scratches that require sanding
- Glue residue on the surface, which will stop your finish from being absorbed evenly
Next, sand the whole body. Start with 180 grit sandpaper on a hard sanding block, then follow with 240 grit. Sand with the grain, keep the block flat, and take your time on the contours and around the monkey-grip handle cutout, where it is easy to round over an edge by accident.
If you are applying a stain directly to the raw wood, sand up to 400 grit. Sanding any smoother than 400 can start to affect how well the stain is absorbed.
After sanding, raise the grain. Wipe a small amount of moisture over the surface of the guitar. Denatured alcohol is a good option here because it evaporates before it soaks deep into the timber. When the raised fibers dry, knock them back with a light pass of your finest grit. This gives you a smoother final finish.
Section 2: Finishing the body and neck
Finishing is the stage that most affects how your guitar looks, and it is the stage that rewards patience the most. This section is written so you can follow it on any kit, whatever finish you choose.
Pick your finish first, because it changes your prep:
- Hand-rubbed oil is the most forgiving finish for a first build. It soaks into the wood, is easy to repair, and needs no spray gear.
- Stain colors the wood while letting the grain show. Sand to 400 grit, test your stain on a hidden area or an offcut first, and wipe it on evenly so you do not get blotches.
- Solid paint hides the grain and needs a grain filler and primer on open-grain woods, plus a clear coat on top.
Whatever you choose, work in thin coats. Thin coats dry evenly and are far easier to fix than thick, runny ones. Let each coat cure as the product directs, then level any dust or texture with a very fine grit before the next coat. Finish the inside edges of the monkey-grip cutout at the same time as the rest of the body so the color and sheen match.
Do not rush the final cure. A finish can feel dry to the touch long before it is hard enough to buff or to have hardware bolted onto it. Give it the full curing time on the label before you move to assembly. When you are unsure of the exact product or drying time for your kit, check your kit’s spec on the product page.
Section 3: Dry-fit and install the bolt-on neck
Superstrat kits use a bolt-on neck, which makes this one of the friendliest joints to work with. A typical 24-fret superstrat has a scale length of 25.5 inches (64.77 cm), and the fretboard extends over the body toward the neck pickup, so handle those top frets gently.
Dry-fit the neck before you screw anything down. First push the heel gently into the back of the neck pocket, then push the neck down flat. Fitting it in this order reduces the risk of chipping the thin edges of the neck pocket before the neck has been installed.
Check the fit:
- Once the neck is seated in the pocket, it should have very little sideways movement. If there is a gap on either side of the neck, you may need to shim the neck.
- Check the neck angle by running a steel ruler along the fretboard and over the bridge. With the bridge sitting flat against the body, the steel ruler should sit just above the saddles. If it does not, recheck the neck seating before you commit.
When you are happy with the fit, drill pilot holes for the neck screws (see the pilot-hole method in the next section), fit the neck plate on the back, and tighten the screws firmly and evenly. Snug them in a cross pattern so the neck draws down square in the pocket. Do not overtighten, as the screws thread into wood.
Section 4: Install the hardware
This is probably the most exciting part, as your guitar slowly comes to life. For a video walkthrough of this stage, see the hardware installation walkthrough.
Almost every part on the guitar is held by small wood screws, and those screws are fragile and easy to strip. The small screws that secure your tuners, for example, snap or strip very easily. So drill a pilot hole for every screw that goes into the body or the neck. Use this method each time:
- Put masking tape on the guitar where the part goes, and mark the hole location on the tape with a pen.
- Make a small indentation in the wood through the masking tape using a center punch or a similar tool. This stops the drill bit from wandering.
- Choose a drill bit about two-thirds the thickness of the screw. Mark your drilling depth on the bit with a wrap of masking tape so you do not go too deep.
- Always aim to drill straight. If you have a drill press, that is preferred for clean, square holes.
- On softer, less dense woods such as basswood or mahogany, ease off the depth a little so the screw threads still grip firmly.
- Use a countersink bit (or similar) to chamfer the edge of any hole in the body, especially on a solid-color painted finish, to prevent the finish from chipping.
With your pilot-hole method ready, install the hardware in a sensible order:
- Tuners: Fit the six-in-line tuners into the headstock, line them up straight, then pilot-drill and screw down the mounting screws or press-fit bushings as your kit requires.
- Bridge: Mount the bridge or tremolo (covered in detail in Section 6). Get its position and pilot holes right before drilling, because the bridge sets your string spacing and scale length.
- Output jack: Fit the input jack into its cavity or jack plate.
- Strap buttons: Pilot-drill and fit the two strap buttons.
- Pickups: Mount the HSH pickups (humbucker, single-coil, humbucker) into the pickguard or directly into the body routes, ready for wiring.
Keep all your screws and washers sorted as you go so nothing gets lost.
Section 5: Connecting the electronics (HSH, 5-way, 1 volume, 1 tone)
The wiring diagram supplied with your kit is the authority for this stage. This kit uses an HSH pickup set with 1 volume, 1 tone, and a 5-way switch. Follow the exact diagram on your product page for wire colors and connection points, since colors differ between pickup makers.
Soldering basics. If you have not soldered before, you will need a soldering iron, solder, and a damp sponge to clean the tip of your iron. Two ideas make soldering click:
- Tinning means keeping a light coating of solder on the tip of your iron. It helps heat transfer and stops the tip from oxidizing.
- Heat transfer. Soldering is really about moving heat. Preheat the lug or component you are joining so the solder is drawn onto it, rather than sitting on the already hot iron. A good joint is shiny and smooth, not a dull grey blob.
Remember the temperatures from the safety section: solder melts at 185°C (365°F), and the iron runs far hotter, so rest it in its stand between joints.
How the 5-way switch works. With an HSH layout, the 5-way switch blends the bridge humbucker, the middle single-coil, and the neck humbucker. A common arrangement gives you these five voices, though the exact behavior depends on your switch type and your kit’s diagram:
| Position | Sound |
|---|---|
| 1 (toward the bridge) | Bridge humbucker |
| 2 | Bridge humbucker inner coil plus middle single-coil |
| 3 (middle) | Middle single-coil |
| 4 | Middle single-coil plus neck humbucker inner coil |
| 5 (toward the neck) | Neck humbucker |
Positions 2 and 4 are the softer in-between tones. Wire the pickups to the switch, run the switch output to the volume pot, take the tone pot off the volume as your diagram shows, and send the output to the jack. Ground everything back to the backs of the pots, and do not forget the ground wire that runs to the bridge or tremolo, which quiets hum when you touch the strings. Humbucker-equipped kits commonly use 500k pots and a tone capacitor near 0.022 uF, but your kit’s supplied parts and diagram are the final word.
Before you button it up, plug in and test. Tap each pole piece with a metal screwdriver through an amp and move the switch through all five positions to confirm every pickup and every position responds.
Section 6: The bridge, and the double-locking tremolo or fixed setup
This kit ships with one of two bridge systems. Read the part that matches yours.
If your kit has a double-locking tremolo
A double-locking tremolo clamps the string at two points, the locking nut at the headstock end and the saddle blocks at the bridge, which is what keeps it in tune through heavy vibrato use.
- Stringing. Cut the ball end off each string, feed the cut end into the saddle block, and clamp it with the block screw. Bring the string up to pitch with the machine head at the headstock.
- The floating bridge. The bridge pivots on two posts and floats, balanced between the pull of the strings and the pull of the tremolo springs in the back cavity. Adjust the spring claw screws in the back so the bridge baseplate sits level, or parallel to the body, when the guitar is tuned to pitch. More spring tension counters heavier strings or higher tunings.
- It is iterative. Because the bridge floats, tuning one string changes the tension on all the others. Tune in several passes until it settles and the baseplate sits level at pitch.
- Lock the nut last. Once the guitar is in tune, clamp the three pads of the locking nut with their hex bolts. From then on, tune only with the fine tuners at the bridge. Retune with the machine heads if the fine tuners run out of range, which means unclamping the nut again.
- Action on this bridge is set by raising or lowering the two pivot posts, which moves the whole bridge up or down together.
If your kit has a fixed Tune-O-Matic and string-through tailpiece
- Stringing. Feed each string through the ferrules on the back of the body (string-through) and over the saddles.
- Action is set at each saddle. Taking the small hex key in your packaging, turn the individual saddle posts counter-clockwise to lower a saddle or clockwise to raise it.
- Intonation is set with the screws at the back of each saddle, covered in the setup section below.
Section 7: Final setup and tune-up
Setup is where a kit becomes a real, playable instrument. Work through these adjustments in order, then go back around, because each one affects the others. Tune the guitar to concert pitch before and during every adjustment so the strings put the correct tension on the neck.
Neck relief (truss rod)
The ideal neck has a small amount of inward bow, called relief, to give the strings clearance to vibrate. Adjust it with the hex wrench in the truss rod:
- Turn counter-clockwise to loosen the truss rod, which adds relief.
- Turn clockwise to flatten the neck.
- Only make small changes of an eighth to a quarter turn at a time, retuning and rechecking after each one.
String action (height)
Action is the height of the strings above the fretboard, usually measured from the top of the 12th fret to the underside of the low E string. A good starting point, if you are unsure, is 2.4 mm on the low E side and 1.6 mm on the high E side, allowing for the different string gauges. On a fixed bridge, set this at each saddle post. On a double-locking tremolo, set overall height at the two pivot posts.
Intonation
Intonation means the guitar is in tune with itself. Tune to standard pitch, then compare the open string, or its 12th-fret harmonic, with the note fretted at the 12th fret (one octave up).
- If the fretted note is sharp, lengthen the string by turning the saddle intonation screw at the back counter-clockwise.
- If it is flat, shorten the string by turning that screw clockwise.
On a double-locking tremolo, intonation means sliding the saddle itself, which usually means relaxing string tension and unlocking the saddle first, so take your time.
Pickup height
Pickup height is mostly down to what you are hearing, but a good starting point is 2.4 mm from the top of the magnetic pole piece to the underside of the string, measured while pressing the string down at the last fret. Adjust it with the mounting screws on the outside of the pickup surround. Raising a pickup makes it louder and brighter, but too close and the magnets can pull on the strings.
Finish by tuning to concert pitch, stretching the strings in by hand, and retuning until it holds.
Beginner watch-outs
| Watch out for | Why it matters | What to do |
|---|---|---|
| Skipping pilot holes | Small wood screws strip or snap, especially tuner screws | Drill a pilot hole for every screw, about two-thirds the screw thickness |
| Chipping the neck-pocket edges | The thin pocket edges break easily during a dry-fit | Seat the heel first, then push the neck down flat |
| Over-sanding before stain | Sanding past 400 grit stops stain being absorbed evenly | Stop at 400 grit for a direct stain |
| Rushing the finish | A soft, uncured finish dents and marks under hardware | Give each coat, and the final cure, its full time |
| Big truss rod turns | Large adjustments can damage the neck or rod | Move only an eighth to a quarter turn, tuned to pitch |
| Forgetting the bridge ground | Missing ground wire leaves the guitar noisy | Run a ground wire to the bridge or tremolo |
| Cold solder joints | Dull, lumpy joints fail and cause dropouts | Preheat the lug so the joint is shiny and smooth |
Pro tips
- Pro tip: Read each section fully before you start it, and keep your work area clean. The most common beginner mistake is hurrying.
- Pro tip: Raise the grain with a damp pass of denatured alcohol before finishing, then knock it back with your finest grit for a smoother result.
- Pro tip: Mark your drill depth on the bit with masking tape so you never drill through a body or too deep into a neck.
- Pro tip: A drill press gives you straighter, squarer holes than a hand drill if you have access to one.
- Pro tip: On a double-locking tremolo, tune in several passes and get the baseplate sitting level at pitch before you clamp the locking nut. Do the fine tuning at the bridge afterward.
- Pro tip: Label or photograph your wiring against the kit diagram before you solder, so you can check your work against it.
When you get stuck
Take your time, and do not force anything. Questions about a step? Comment below and we will help you right here. If a part looks wrong, is missing, or arrived damaged, email our support team at [email protected] with the email address you used for your purchase, your order number, and a photo, and the team will get you sorted out quickly. When your build is done, share it in the DIY Guitars category so the community can see what you made.
For a visual walkthrough of the hardware stage, see the hardware installation walkthrough, and you can find the full kit here: 24-Fret Superstrat Electric Guitar Kit.