Welcome to your double-cutaway set-neck build. This kit uses set-neck construction (also called a set-in neck), where the neck is glued into a solid mahogany body instead of bolted on, so it is a good next step if you have already built a bolt-on kit.
Difficulty: Intermediate (set-neck gluing)
Build time: A few weekends, plus finish cure time
Kit: Double-Cutaway Set-Neck Guitar Kits
Deep-dive modules (universal references that go deeper than any single manual):
Finishing and painting · Neck installation · Wiring and soldering · Final setup
What’s in the box
Every kit is packed a little differently, so lay everything out and check it against this list before you start. If anything looks missing or wrong, stop and email [email protected] before you go any further.
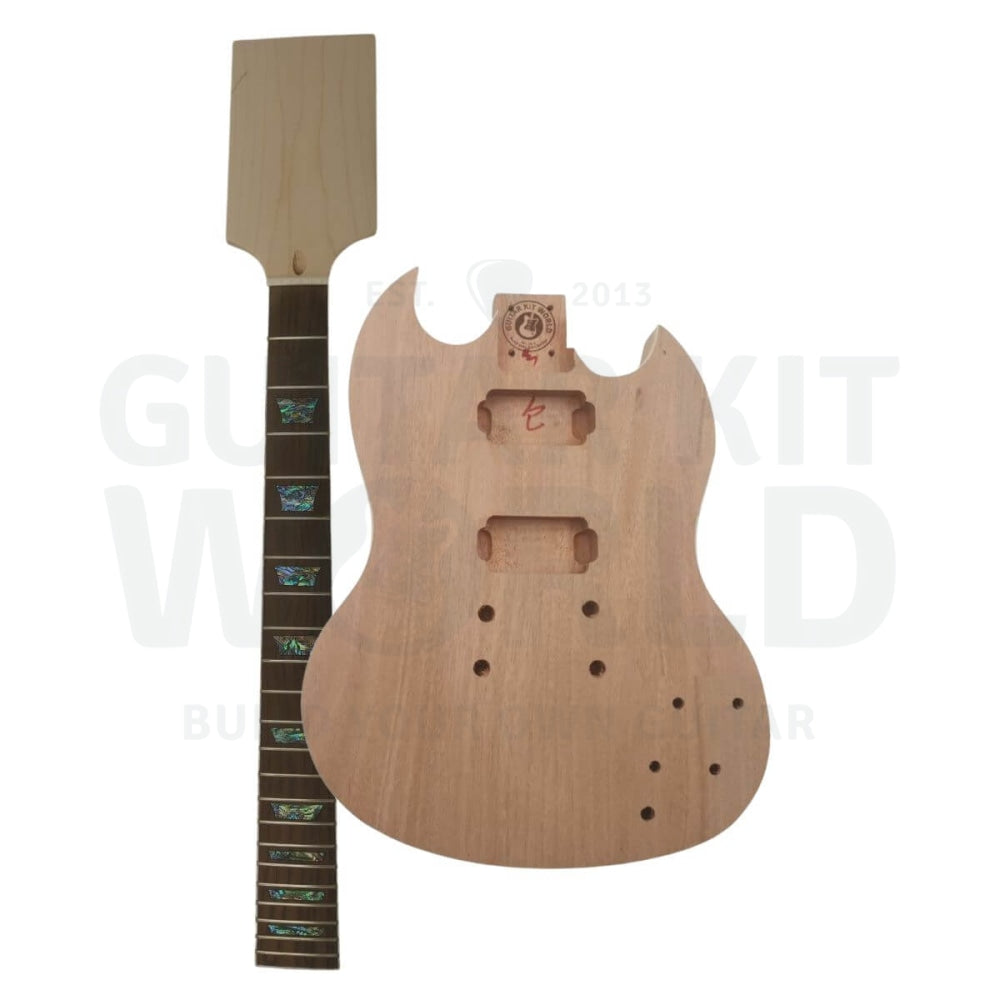
- Mahogany body and a matching set-neck (not yet glued in)
- Six tuning machines (three per side) with their washers and bushings
- Tune-O-Matic bridge and tailpiece, with their posts and bushings
- Two humbucker pickups, neck and bridge (the bridge pickup has the deeper mounting ring)
- Two volume and two tone pots (the tone pots carry the small green capacitors)
- Three-way pickup selector switch
- Input jack
- Control knobs
- Truss rod cover
- Pickguard (scratch plate)
- Plastic electronics cavity cover for the back
- Assorted screws and washers
- Allen key for the truss rod
Tools you’ll need
- Abrasives: Sandpaper (120, 180, and 220 grit)
- Adhesives: PVA wood glue
- Finishing: Low-tack masking tape, water-based grain filler, wood stain, buffing oil (tung oil/beeswax blend), clean rags
- Hardware tools: Precision screwdrivers, electric drill with small bits, center punch, countersink bit, clamps, allen key, steel rule/action ruler, hammer (with a protective wood block)
- Electronics: Soldering iron, solder, damp sponge
- Safety gear: Eye protection, disposable gloves, a dust mask for sanding, and a respirator or particle mask with good ventilation for finishing and soldering
Section 1: Initial Inspection and Preparation
- Inspecting the body: Look over the mahogany body and veneer for major defects, dents, deep scratches, or glue stains that might prevent your finish from absorbing.
- Dry fitting the neck: Insert the neck heel into the cavity and push down to check the neck alignment and angle.
- Checking scale length: Measure the distance from the nut to where the bridge will normally sit. For this double-cutaway set-neck kit, it should be exactly 628mm (24.75 inches). An easy way to check is to measure from the nut to the center of the 12th fret and double that number. A few millimeters either way is fine, because the bridge saddles let you fine-tune it later at the intonation stage.
- Checking neck alignment: If the neck is loose, measure to find the center of the neck heel and the center between the two pre-drilled bridge holes. Draw a line to ensure they line up perfectly. There should be very little sideways movement once the neck is seated. If you find a small gap, you can shim it with a sliver of scrap wood before you glue.
- Checking the neck angle: Lay a steel rule flat along the fretboard so it runs out over the bridge. With the bridge sitting flat in place, the rule should just clear the tops of the saddles. This tells you the neck angle is right before you commit to gluing.
Section 2: Setting the Neck
- Prepping the cavity: Clean out the neck cavity and the neck heel using a small brush to ensure there is no dust.
- Applying the glue: Using a brush, apply a nice, even coating of PVA glue to both the neck cavity walls and the neck heel.
- Setting the joint: Push the end of the heel in first, push down, and then push the entire neck firmly into place.
- Clamping: Apply two clamps, one to the heel of the neck and one to the underside of the body. Put a scrap of wood between each clamp and the guitar so the jaws do not dent the timber. Leave clamped for 24 hours (or check the manufacturer recommendations).
Section 3: Finishing the Body and Neck
- Masking: Apply masking tape to protect the fretboard, the electronics cavity at the back, and the pickup cavities at the front. Also cover the tuning peg holes, the bridge and tailpiece post holes, and the truss rod area, so finish does not run in and clog them. It helps to wipe the bare body down with denatured alcohol first to lift any dust and oils.
- Grain filling: Mix your water-based grain filler and apply it first with the grain, and then across the grain to work it into the pores. After 20 minutes, wipe away the excess with a damp rag.
- Progressive sanding: Once dry, sand level to the wood. Start with 120-grit to remove grain fill residue, follow up with 180-grit to remove the 120-grit scratches, and finish with 220-grit.
- Raising the grain: Before you stain, wipe on a little water or denatured alcohol to raise the grain, let it dry, then lightly sand it smooth again with 220-grit. The fibers usually lift only once, so after this your stain goes on evenly.
- Staining: Fold the edges of a clean rag inward (to prevent frayed fibers) and wipe the stain evenly across the body.
- Sealing the neck: Do not use a thick glossy finish on the back of the neck, as your hand will drag. Apply a very light coat of tung or linseed oil to seal it, and buff it to a fast, matte finish.
- Polishing the body: Apply your buffing oil/wax mix. Once dry, press hard and work in a circular motion with a clean rag to polish it to a shine.
Section 4: Hardware Installation
- Installing the tuners: Separate the left and right tuners. Thread them through from behind, place the washer on top, and secure with the bushing. Use a steel rule to align them perfectly straight. If you would rather, fit the two outer tuners first and draw a line between them on masking tape, then mark the rest off that line.
- Drilling pilot holes: Always drill pilot holes for tuners, truss rod covers, and strap buttons to avoid stripping the soft screws. A good rule is to pick a drill bit about two-thirds the thickness of the screw, mark each spot with masking tape and a pen, then dent the center with a punch so the bit does not wander.
- Centering the truss rod cover: The nut is 42mm wide, so the centerline of the neck sits 21mm in from either edge. Lay a strip of masking tape across the headstock, mark that centerline, and line the cover up to it before you drill.
- Grounding the bridge: Before installing the bridge, push your bare ground wire through the side hole into the bridge post cavity so it will sit pressed against the metal bushing. Strip a few millimeters of the coating off the end first so bare wire makes the contact, and bend a small hook in the tip so it sits at the top of the post hole and stays put when you press the bushing in.
- Installing bridge bushings: Push the stud-mounted bridge bushings into place. If they are tight, place a block of timber over them and gently tap with a hammer to preserve the finish.
- Installing the tailpiece posts: Press the tailpiece bushings in the same way and screw in the tailpiece posts. Wait to fit the tailpiece itself until you string up, so it is not in your way during setup.
Screw identification guide
- Tuner screws: Very small, fragile screws used to secure the tuning machines to the back of the headstock.
- Pro tip: Always drill pilot holes first, as these will easily strip or break in the mahogany wood.
- Truss rod cover screws: Very short screws used to attach the plastic bell-shaped cover just above the nut on the headstock.
- Warning: Make absolutely sure you are using the shortest screws here. Using longer screws will pierce right through the back of your headstock.
- Strap button screws: Thicker, medium-length screws that pass through the metal strap button and its rubber footing to secure them to the bottom bout of the guitar and the neck heel.
- Pickup mounting screws: Eight (8) longer screws used specifically for mounting the humbucker pickup rings into the body cavity. Because they need to secure the pickups firmly into the timber, these have a longer threaded section.
- Pickguard and cavity cover screws: A series of smaller, shorter screws. These are used to attach the front pickguard (scratch plate) between the pickups, as well as the plastic electronics cavity cover on the back of the guitar.
Section 5: Electronics and Pickups
- Installing controls: Install the input jack, pickup selector, tone pots (identifiable by green capacitors, placed at the back), and volume pots (placed at the front).
- Pickup placement: The bridge pickup has a larger profile ring. Ensure the individual pole pieces on the pickups are facing outward from each other. Sit the pickups at the very front of their cavities and line the pole pieces up under the low and high E strings. A small square held against the edge of the fretboard helps you keep them square.
- Soldering prep: Keep your iron tip clean with a damp sponge. Always “tin” the tip of your soldering iron, the exposed wires, and the pot lugs before connecting them. When you make a joint, heat the lug or pot for a second or two and let the solder flow onto it, rather than melting solder on the iron and wiping it across. Solder flows at around 185°C (365°F) and your iron runs far hotter than that, so treat the tip as dangerous and let each joint cool before you tug-test the wire.
- Wiring connections: Connect hot wires through the eyelets of the lugs, and solder the uncoated ground wires directly to the back of the volume/tone pots to complete the ground circuit. Once wired, tap each pickup with a screwdriver through a plugged-in amp. You should hear each one, which confirms both are connected before you move on.
- Wire color coding: Identify and route your wires using the standard color guide.
- Black: Used as the ground wire throughout the circuit (connecting the backs of pots, pickup selector ground, input jack ground, and the main bridge ground).
- Green: Used as the main output wire coming from the pickup selector switch to the active/hot lug of the input jack.
- Red: The active/hot wire for the neck pickup. This color coordinates with the wire coming from the neck position on the pickup selector.
- White: The active/hot wire for the bridge pickup. This color coordinates with the wire coming from the bridge position on the pickup selector.
- Wire color coding: Identify and route your wires using the standard color guide.
Section 6: Final Setup and Testing
- Tuning: Always tune the guitar to concert pitch before and during your setup adjustments.
- Adjusting neck relief: Fret the low E at the 1st and last fret, then tap the 12th fret. If the string lays completely flat (no bounce), introduce more relief by turning the truss rod counter-clockwise about an 1/8th of a turn. If instead the string sits well clear of the 12th fret, you have too much relief, so tighten the truss rod clockwise. Either way, move only an 1/8th to a 1/4 turn at a time, then retune and check again.
- Adjusting action: Measure at the 12th fret. A good starting point is 2.4mm clearance on the low E string and 1.6mm on the high E string. Raise or lower the bridge thumbwheels to adjust.
- Setting intonation: Play an open E, then hit the 12th fret. If the 12th fret is sharp, turn the intonation screw counter-clockwise to move the saddle further back. If it is flat, move it forward.
- Adjusting pickup height: Hold down the last fret. Measure from the underside of the string to the top of the pole pieces. Set to roughly 2.4mm on the bass side and 2.0mm on the treble side.
Beginner watch-outs
| What to look for | Why it matters and how to prevent it |
|---|---|
| Stripped hardware screws | Kit screws are small and fragile. Prevention: Always drill a pilot hole first, and use hand tools (precision screwdrivers) rather than power tools to drive them in. |
| Electrical hum | A loud buzz when you are not touching the strings means the guitar is not grounded. Prevention: Ensure the ground wire is making solid metal-on-metal contact with the bridge bushing, and double-check all your solder joints on the back of the pots. |
Pro tips
- Step-by-step sanding: When sanding back grain filler, do not jump straight to fine-grit paper. Start with 120 grit, move to 180, and finish with 220. Skipping grits will quickly clog up your fine sandpaper and force you to overwork the wood.
- Keep the neck fast: Avoid applying thick, glossy finishes to the back of the neck, as they cause friction and make your hands stick while playing. Instead, use a light coat of tung oil, Tru-Oil, or linseed oil buffed to a matte finish.
- Create a drill depth stop: When drilling pilot holes for fragile hardware screws, wrap a piece of masking tape around your drill bit at 2/3 the depth of the screw. This prevents you from accidentally drilling entirely through the headstock or body.
- Protect the body during hardware install: If you need to hit the bridge bushings with a hammer to press them in, always place a flat block of timber between the hammer and the guitar body to prevent denting your new finish.
- Tin before you solder: To make clean and reliable electrical connections, always “tin” the components first. Apply a light coating of solder to the tip of your soldering iron, the exposed wires, and the pot lugs before joining them together.
- The “tap test” for neck relief: To easily check if your neck is too flat without using feeler gauges, fret the low E string at the 1st fret and the last fret at the same time. Tap the string at the 12th fret. If there is a tiny bit of movement before it hits the fret, your neck relief is perfect. If it lays dead flat, you need to loosen the truss rod.
- Testing: Plug in and turn both volumes to 10. Take your hands off the guitar. If you hear loud electrical hum, check your ground circuit for loose wires. Play up and down the neck to listen for fret buzz.
When you get stuck
Take your time, and do not force anything. Questions about a step? Comment below and we will help you right here. If a part looks wrong, is missing, or arrived damaged, email our support team at [email protected] with the email address you used for your purchase, your order number, and a photo, and the team will get you sorted out quickly. When your build is done, share it in the DIY Guitars category so the community can see what you made.
For the full build from start to finish, follow along with the complete video playlist, and find everything you need on the kit page: Double-Cutaway Set-Neck Guitar Kit.