This is a complete, beginner-friendly guide to how to build a reverse-body offset electric guitar kit from a flat-pack of parts into a real, playable instrument. The reverse-body offset is a double-cutaway solid-body electric with a long lower horn, a reverse headstock, two mini-humbucker pickups, and a stud-mounted Tune-O-Matic bridge. It is a great DIY guitar kit assembly project if you have built one kit before and want to try a set-neck or a neck-joint build with a slightly more involved finish and wiring job. You do not need to be a professional woodworker. Take your time, read each section fully before you start it, and enjoy the process.
Difficulty: Intermediate
Build time: 15 to 30 hours of hands-on work over one to two weeks (most of the calendar time is finish and glue curing)
Kit: Reverse-Body Offset Guitar Kits
Deep-dive modules (universal references that go deeper than any single manual):
Finishing and painting · Neck installation · Wiring and soldering · Final setup
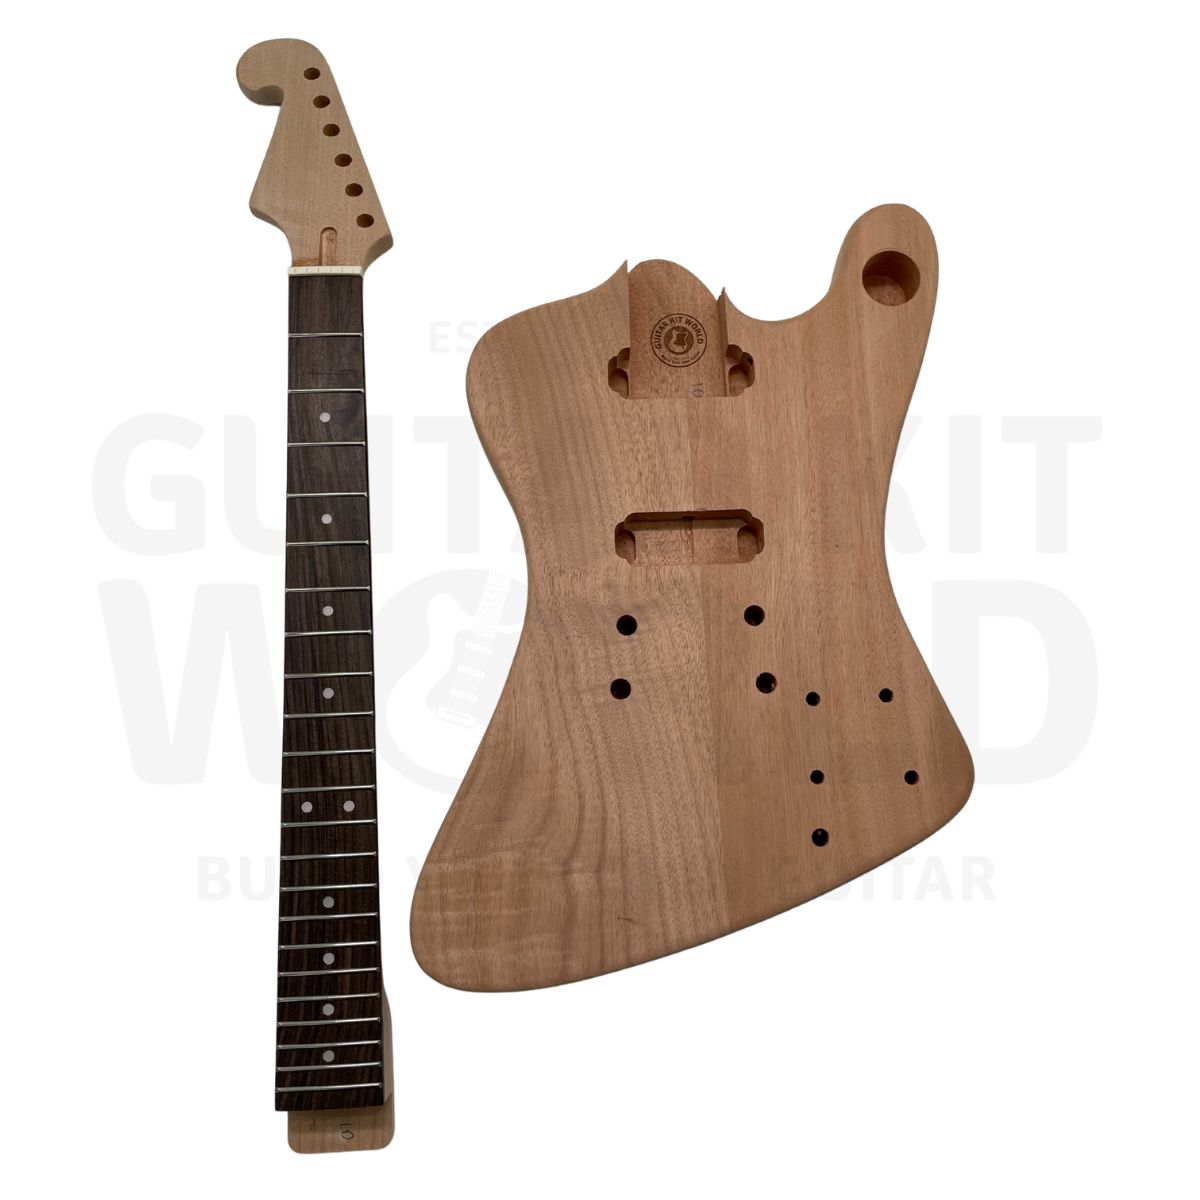
What’s in the box
Check every part against this list before you begin. If anything looks wrong or is missing, stop and email support before you go further.
- Prepped reverse-body offset body (solid, with a rear electronics cavity)
- Completed neck with fretboard and truss rod
- Neck plate, cushion, and screws (for the bolt-on version)
- 2 strap buttons
- 6 tuning machines, arranged 3 per side for the reverse headstock
- Stud-mounted Tune-O-Matic bridge with a separate stopbar tailpiece
- Neck mini-humbucker pickup
- Bridge mini-humbucker pickup
- 2 volume controls (pots)
- 2 tone controls (pots)
- 2 capacitors
- 3-way pickup selector switch (toggle)
- Output jack
- Truss rod cover
- Pickguard
- Electronics cavity cover
- Cable and hex wrench for truss rod adjustment
- Tone and volume knobs
- Assorted screws and washers
Tools you’ll need
You do not need a full workshop, but the right tools make a large difference. Gather these before you start.
Power tools
- Electric jigsaw or coping saw (only if you shape the headstock yourself)
- Electric drill with an assorted bit set
- Soldering iron
Hand tools
- 2 timber clamps (needed for the set-neck version)
- Steel ruler, at least 40 cm long
- Hard sanding block
- Center punch or a sharp marking tool
- Large and small screwdrivers (both Phillips and flat-head)
- Needle-nose pliers
- Countersink drill bit
Safety equipment
- Protective eyewear or a face shield (not your everyday prescription glasses)
- N95 rated dust mask for sanding
- R95 rated particle mask for finishing
- Disposable gloves
Section 1: Inspect your kit and dry-fit the neck
Lay every part out under good lighting and look the body and neck over carefully.
- Look for dents that need filling, deep scratches, and any glue residue. Glue stains only matter on kits with binding or a veneer top, where they can show through a stain or clear coat.
- Gently seat the neck heel into the neck pocket, then press it flat. It should sit snug with very little sideways movement.
- Check the scale length. A reverse-body offset kit should have a scale length of 628 mm (24.75 inches). Measure from the edge of the nut to the middle of the 12th fret and double that number. The two halves should match.
- Mark the center of the neck heel and confirm it lines up with the centers of the pickup cavities. This keeps the strings running straight down the neck and over the pole pieces.
- Check the neck angle. Lay your steel ruler flat on the fretboard and let it run out over the bridge area. The ruler should sit just above where the bridge saddles will be. If it points well above or digs below, the angle is off and you should stop and email support.
If there is a small gap in the neck joint, you can fill it. A significant gap can be shimmed with a thin piece of scrap wood, and a minor gap can be closed with a matching filler. Do not force a poor fit.
Section 2: Shape the headstock (optional)
Many kits arrive with the headstock already shaped. If yours comes as a blank, or you want your own outline, this is the stage to do it, before any finish goes on.
- Draw your design on paper at full size first.
- Leave a safety margin of at least 15 mm between the last tuning hole and the edge of the headstock. Any less and the wood around the tuner can be weak.
- Transfer the design to a thin piece of timber or cardboard and cut a template.
- Cut the shape with a coping saw, jigsaw, or bandsaw. Keep the blade vertical so the edge stays square, and leave a small margin outside your line for sanding.
- Protect the rest of the neck while you cut, then sand the edges smooth.
Pro tip: A well executed simple design is better than a poorly executed complex one.
Section 3: Install the neck (set-neck and bolt-on)
Your kit is either a set-neck (the neck is glued permanently into the body) or a bolt-on (the neck attaches with a plate and screws). The path you take depends on your kit, so check your kit’s spec on the product page if you are unsure.
Set-neck version
Glue the neck before you finish the guitar, so the body and neck can be finished as one piece.
- Clean all dust from the neck pocket and the neck heel so the glue bonds to bare wood.
- Apply wood glue (PVA or a Titebond-style glue) evenly to both mating surfaces.
- Seat the neck, then clamp it with scrap wood between the clamp jaws and the guitar so the clamps do not dent the wood. One or two clamps, tightened firmly, is enough.
- Wipe any squeeze-out right away, then leave it to cure overnight, or for as long as your glue’s instructions say.
Bolt-on version
You can leave the bolt-on neck off until after the body is finished, which makes finishing much easier.
- Finish the body and the neck separately (see Sections 4 to 7).
- When the finish has cured, seat the neck in the pocket, add the cushion and neck plate on the back, and drive the screws through the plate into the body. Follow the pilot-hole method in Section 7 so you do not split the wood or strip a screw.
Pro tip: For a bolt-on build, screw a scrap-wood handle into the neck pocket or a cavity so you have something to hold while you spray the finish.
Section 4: Sand and prepare the wood
A good finish is mostly good sanding. Do not rush this.
- Sand the whole body with the grain, moving from 180-grit up to 240-grit.
- If you plan to stain the wood, sand up to 400-grit and no finer. Sanding too smooth closes the grain and stops the stain soaking in evenly.
- Raise the grain before your final sanding. Wipe the surface with a little water or denatured alcohol, let it dry fully, then knock the raised fibers back flat with your fine paper. This usually only needs to be done once, and it stops the grain lifting later when the finish goes on.
Section 5: Fill the grain (optional, for open-grain woods)
Open-grain woods such as oak and mahogany have deep pores that show through a glossy finish. Basswood is close-grained and usually does not need this step.
- Oil-based fillers soak in deeper, and water-based fillers clean up more easily. A tinted filler will make the grain pattern pop.
- Mix the filler to a workable paste following the product’s directions.
- Wipe it on with a clean rag along the grain, then work it across the grain to push it down into the pores. Go over the area more than once.
- Wait about 10 minutes, then wipe the excess off with a damp rag.
- Once it is dry, sand back to the bare surface with 120-grit to 240-grit paper, taking off the excess without digging into the wood.
- If pores still show, repeat until the surface is level.
Section 6: Mask off the hardware areas
Finish that gets into the wrong places causes problems later, so mask carefully before you spray.
- Mask the neck pocket and all body cavities.
- Mask every tuning-peg hole on the headstock.
- Mask the bridge and tailpiece stud holes.
- Pay special attention to the truss rod area.
- When you spray the back of the neck, mask the fretboard.
- On a bound body you can either mask the binding (finish can still creep under the tape) or leave it and scrape it clean with a razor after spraying. If the binding has any cracks, mask it, because finish will soak into the cracks and stain them permanently.
Section 7: Finish the body and neck
Finishing is the longest stage in calendar time because each coat has to cure. Work in a clean, well ventilated space, and treat the whole job as its own skill.
Safety first. Paint fumes are dangerous. Only finish in a well ventilated area, wear your R95 mask for finishing and your N95 mask for sanding (water-based products may only need the N95 for both), and always check the product’s own recommendations.
- Clean the body with a degreasing product before you start, then handle it only with disposable gloves so skin oils do not contaminate the surface.
- Clean all the dust out of the cavities. Trapped dust becomes airborne the moment you turn the guitar over and can settle into a wet coat.
- Remove every strand of steel wool before you spray. Stray fibers get trapped in the finish.
- If you are staining, wipe the excess after about 10 minutes, before it fully absorbs, to keep the color even.
- Keep to one product family. Use the same brand and type for your sealer, color coat, and clear coat so they are compatible.
- Do not spray outdoors on a windy day, and do not hang the guitar outside to dry, because it attracts dust. Hang it somewhere cool and dry.
- Spray the sides first, then the front and back, so the overspray from the sides is covered by the later passes.
- Build the finish in several light coats rather than a few heavy ones. Heavy coats run and sag.
- Limit yourself to about 3 coats per day so the earlier coats can cure.
- Recoat within about 1 hour, or wait a full 24 hours and scuff the surface with 600-grit to 800-grit paper before the next coat.
Section 8: Drill pilot holes and mount the hardware
From here on you are drilling into your finished body, so every hole gets a pilot hole. This one habit prevents most beginner disasters.
The pilot-hole method (use this for every screw)
- Put a piece of masking tape where the hole goes and mark the exact spot on the tape with a pen.
- Press a center punch into the mark to make a small dimple so the drill bit cannot wander.
- Choose a drill bit about two-thirds the thickness of the screw.
- Wrap a flag of masking tape around the bit to mark your depth, at about two-thirds of the screw’s length. On softer woods like mahogany and basswood, drill a little shallower, less than that depth, so the screw still bites.
- Drill straight down. A drill press helps a lot here.
- Run a countersink bit lightly around the hole to chamfer the edge, which stops a painted finish from chipping as the screw seats.
Truss rod cover
- Find the center of the headstock. With a nut width of 42 mm, the center line sits at 21 mm.
- Draw a light center line from the nut to the tip of the headstock and line the cover’s screw hole up with it.
Strap buttons
- Fit the rear button in the center of the lower bout and the front button on the top horn. Their placement affects how the guitar balances on a strap.
Tuning machines (reverse headstock, 3 per side)
This is a reverse headstock, which means the tuner layout is mirrored compared with a standard headstock. Work slowly and confirm which tuner will drive which string before you commit to any screw holes.
- Separate the tuners into the left set and the right set.
- Push each tuner through the back of the headstock with its mounting hole facing toward the body.
- Drop the washers over the posts, fit the bushings, and hand-tighten the tuners.
- Line the tuners up with your steel ruler, then mark the mounting-screw holes.
- Drill the pilot holes and drive the small screws.
- To remove the protective covering on the tuner backs, press a piece of masking tape firmly onto the covering and pull the tape and covering away together.
Pro tip: Fit the first and last tuner, lay your steel ruler across them, and mark a straight line on masking tape between the two. Place the middle tuners’ pilot holes on that line so the whole row is dead straight.
Section 9: Install the bridge, tailpiece, and ground wire
The bridge and tailpiece mount on studs pressed into bushings in the body. One of those studs also carries the ground connection that keeps the guitar quiet.
- Find the loose black ground wire in the packaging. It runs from a bridge stud hole through a channel into the electronics cavity.
- Locate the small hole on the side of the bridge-stud hole that faces the control cavity. That is where the ground wire comes up.
- Strip a few millimeters of the coating off the wire to expose the bare strands, and bend a small hook in the top so it seats at the top of the stud hole before the bushing goes in.
- Take the stud out of its bushing, then press the bushing into the body (a rubber mallet helps if it is tight). Make sure the ground wire sits flush against the bushing so metal touches metal.
- Screw the bridge posts into the bridge bushings and the tailpiece posts into the tailpiece bushings.
- Set the bridge over its posts now, but leave the tailpiece off until the strings are on.
Section 10: Install the mini-humbucker pickups
Your kit uses two mini-humbuckers. They are narrower than full-size humbuckers but they mount and wire the same way. One is voiced for the neck and one for the bridge.
- Tell them apart by the surround. The bridge pickup usually has the deeper surround profile.
- Sit each pickup so its lead wires come off the corner of the cavity nearest the control cavity, then feed the wires through the routing channel toward the control cavity.
- To set the pickups straight, it helps to fit the low E and high E strings first. Position the pickups toward the front of each cavity and line the outer pole pieces up under the low E and high E strings.
- Use a small square to check the pickup sits square to the edge of the fretboard.
- Mark the pilot holes, lift the pickups back out, and drill the holes using the pilot-hole method from Section 8.
Section 11: Wire the electronics
The circuit is two volume controls, two tone controls, and a 3-way toggle that selects the neck pickup, both pickups, or the bridge pickup. Most of the electronics arrive already soldered together at the factory. The joints you make yourself are mainly the pickup leads onto the volume pots, plus any grounds. Because the body is solid, you do the wiring through the rear electronics cavity rather than through the top.
Soldering safety and basics
- Be careful. Solder does not melt until it reaches 185°C (365°F), and soldering irons run very hot, from about 392°F to 896°F (200°C to 480°C).
- Wipe the hot tip on a damp sponge to keep it clean.
- Practice on a spare lug before you solder your real components.
Two habits that make clean joints
- Tinning: keep a light coat of fresh solder on the iron tip so it does not oxidize and it transfers heat well.
- Preheating: heat the actual lug or part you are joining, not just the iron, so the solder is drawn to the hot metal and flows into the joint.
Where the wires go
- Each mini-humbucker has an unshielded ground wire and a shielded hot wire.
- Solder the unshielded ground wires to the backs of the volume pots.
- Solder the shielded hot wires to the input lug of the volume pots. That is the right-hand lug when the pot is facing away from you.
- Run the neck pickup to the neck volume pot and the bridge pickup to the bridge volume pot.
Fitting the parts into a solid body
- Wire and mount the pots and the toggle switch through the rear control cavity. Fit the bridge volume and tone controls first, then the neck controls, so you always have room to work.
- If the finish is thick, you may need to countersink the control holes slightly so the pot shafts reach through.
- Secure each pot with its washer and nut, and mount the output jack with its base plate and screw.
- Feed the pickup leads through their channels into the cavity and solder them as above.
Pro tip: If you are ever unsure which pot lug is which, follow your kit’s wiring diagram. The hot lug is on the right-hand side of the pot when the pot is facing away from you.
Test before you close it up
- Plug in and tap each pickup while you switch through all three toggle positions. You should hear each one.
- Turn each volume and tone control to confirm it works.
- Take your hands off the strings and listen. A little hum is normal, but loud buzzing that stops when you touch the strings points to a ground problem. If you hear that, open the cavity and check your ground connections.
- When everything works, fit the electronics cavity cover and the pickguard.
Section 12: String it up, then set the guitar up
Setup is what turns an assembled kit into a guitar that plays in tune and feels good. Do it in this order, and keep the guitar tuned to concert pitch while you work, because pitch changes as you adjust.
Neck relief
- Press the low E string down at the 1st fret and at the last fret at the same time.
- Tap the string down near the middle of the neck and look for a tiny gap. You want a small amount of inward bow, called relief, so the string does not buzz.
- If the string is hard against the frets, add relief by loosening the truss rod (turn counter-clockwise). If it sits well off the frets, reduce relief by tightening (turn clockwise).
- Move in small steps of one-eighth to one-quarter of a turn, then retune and check again.
Action (string height)
Measure the action from the top of the 12th fret to the underside of the string.
- Low E string: about 2.4 mm
- High E string: about 1.6 mm
The high side sits a little lower because the thinner strings vibrate in a narrower path. Raise the whole bridge by loosening its posts, and lower it by tightening them. Retune and recheck after each change.
Intonation
Intonation makes the guitar play in tune all the way up the neck.
- Tune to standard pitch.
- Compare the open string with the note fretted at the 12th fret. They should be the same note one octave apart.
- If the 12th-fret note is sharp, move the saddle back to lengthen the string. If it is flat, move the saddle forward to shorten it. On the saddle screw, counter-clockwise lengthens and clockwise shortens.
- Retune and recheck after every move. The saddles will end up slightly staggered, which is normal, because the heavier bass strings need a little more length.
Pickup height
- Press the string down at the last fret, then measure from the top of the pole piece to the underside of the string. A good starting point is about 2.4 mm.
- Adjust with the mounting screws on the pickup surround.
- Pickup height is mostly about taste. Move them closer for more output, or lower for a cleaner, more open sound, and set them by ear.
Final check
Play every string at every fret and listen for buzzing or dead notes. Fix any buzz with a small tweak to the action or the neck relief. Come back to the setup again after you have played the guitar for a while, because your ear and your touch will tell you what to fine-tune.
Beginner watch-outs
| Watch out for | Why it matters | What to do |
|---|---|---|
| Rushing the build | Hurrying is the most common beginner mistake | Read each section fully before you start it, and do not force anything |
| Skipping pilot holes | The small tuner and hardware screws are fragile and strip easily | Drill a pilot hole about two-thirds the screw thickness for every screw |
| Drilling too deep in soft wood | Mahogany and basswood are soft, so a deep hole leaves nothing for the screw to grip | Drill a little shallower than two-thirds depth in soft woods |
| Paint fumes | Finishing fumes are genuinely dangerous | Only finish in a well ventilated space and wear the correct mask |
| Steel wool fibers in the finish | Stray strands get trapped under a wet coat | Remove all steel wool from the area before you spray |
| Dust in the cavities | It turns airborne when you flip the guitar and lands in wet finish | Clean every cavity thoroughly after sanding |
| Binding cracks | Finish soaks into cracks and stains them for good | Mask cracked binding before any colored finish |
| Reverse headstock confusion | The mirrored tuner layout makes it easy to string a tuner backward | Confirm which tuner drives which string before drilling and winding |
| Hot soldering iron | The tip reaches several hundred degrees | Rest it in its stand, keep the tip clean, and practice first |
Pro tips
- Pro tip: A well executed simple design is better than a poorly executed complex one when you shape your own headstock.
- Pro tip: Use masking tape on the headstock to mark a straight line, so your truss rod cover and your tuner screws land dead center and dead straight.
- Pro tip: Spray the sides of the body first, then the front and back, for clean, professional overspray coverage.
- Pro tip: Wire and fit the bridge-side volume and tone controls before the neck-side ones, so you always have room to work in the cavity.
- Pro tip: Keep a light coat of fresh solder on your iron tip and heat the lug, not just the iron, for clean joints that flow properly.
- Pro tip: Low-tack masking tape around a cavity protects the finish while you install parts.
- Pro tip: Revisit the setup after you have played the guitar for a while. Action, relief, and pickup height all refine as you get a feel for the instrument.
When you get stuck
Take your time, and do not force anything. Questions about a step? Comment below and we will help you right here. If a part looks wrong, is missing, or arrived damaged, email our support team at [email protected] with the email address you used for your purchase, your order number, and a photo, and the team will get you sorted out quickly. When your build is done, share it in the DIY Guitars category so the community can see what you made.
Kit page: Reverse-Body Offset Electric Guitar Kit