You are about to build a real, playable electric guitar from a kit, and you do not need to be a professional woodworker to do it. This is a semi-hollow, single-cutaway electric with a mahogany body and neck, a set-in neck, dual humbuckers, and a Tune-O-Matic bridge. This guide walks you through the whole process from start to finish: preparing the body, staining and finishing, installing the hardware, wiring up the electronics, and doing a final setup so your guitar plays and sounds great.
Take your time. There is no rush, and the most common beginner mistake is hurrying. Read each section fully before you start it, keep your work area clean, and enjoy the process.
Difficulty: Intermediate
Build time: A few weekends, plus finish cure time
Kit: Semi-Hollow Single-Cutaway Guitar Kits
Deep-dive modules (universal references that go deeper than any single manual):
Finishing and painting · Neck installation · Wiring and soldering · Final setup
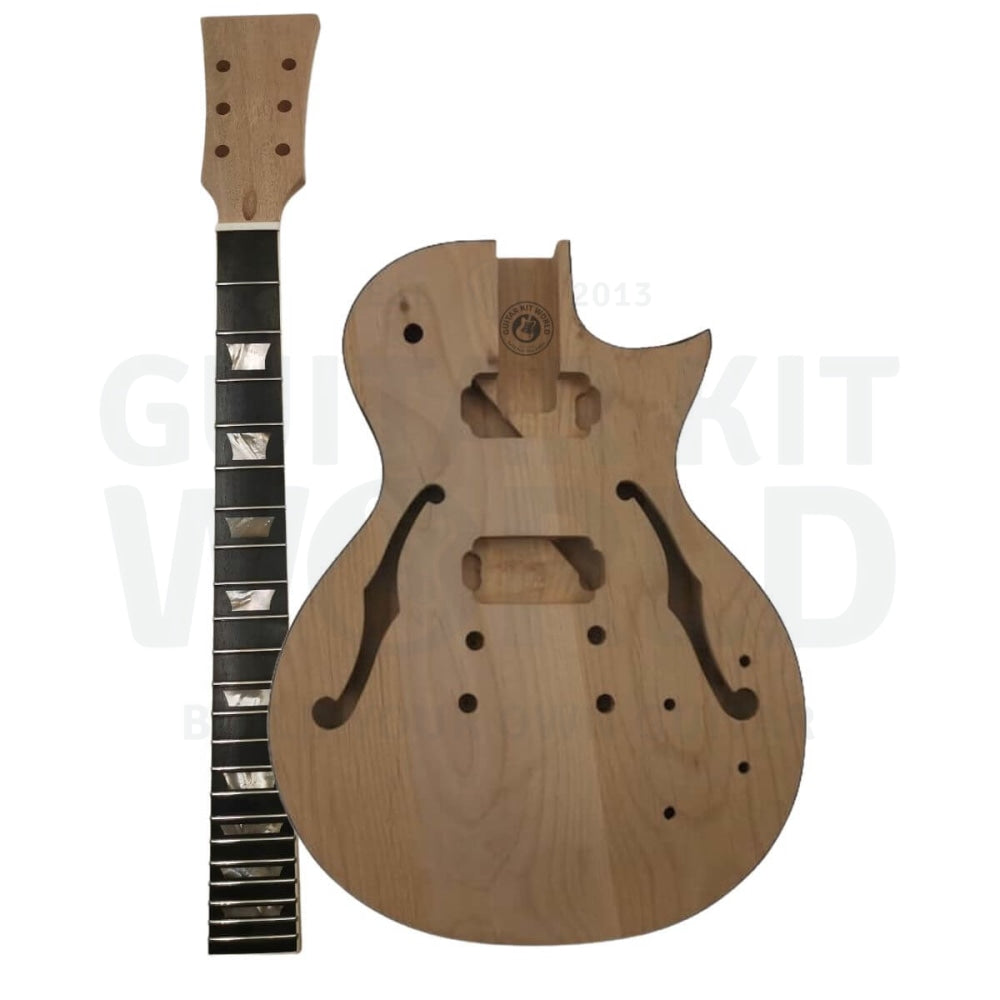
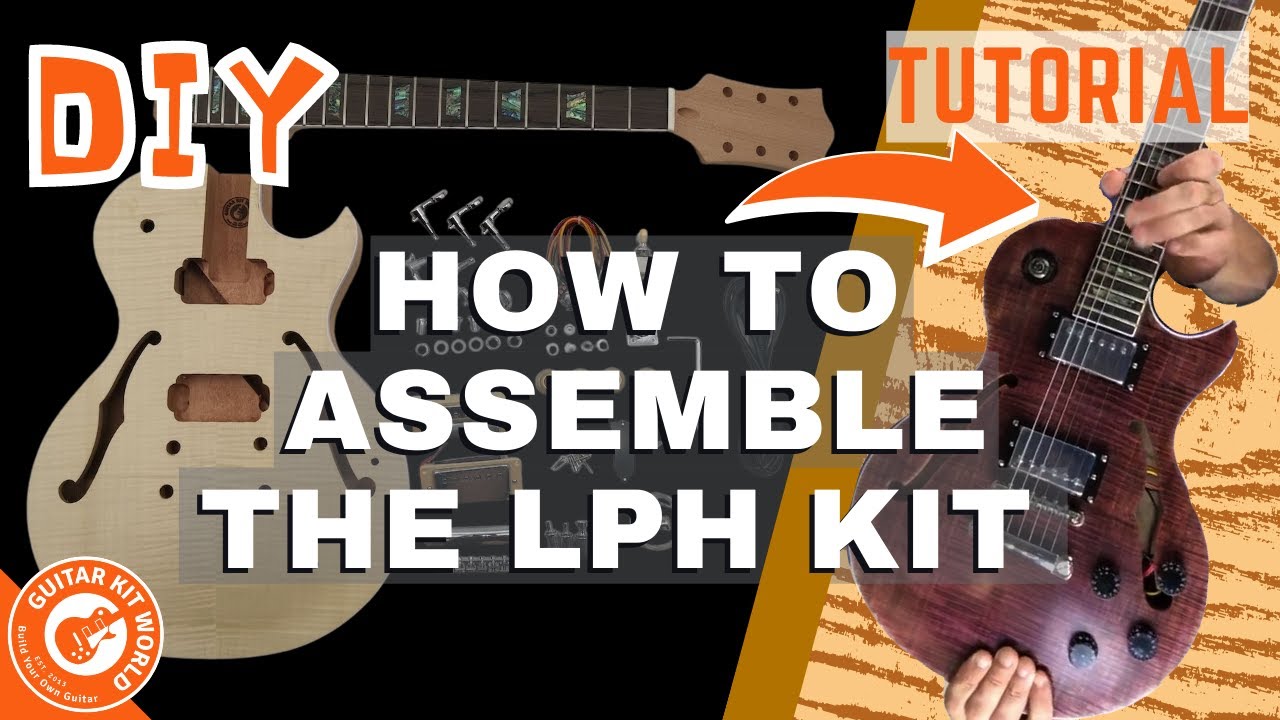
What’s in the box
Before you begin, lay everything out and check it against this list. Inspect the body for any marks, dents, or glue stains under good light.
- Semi-hollow mahogany body with a flame maple veneer top
- Mahogany neck with a rosewood or ebony fretboard and trapezoid inlays
- Two humbucker pickups (a smaller neck pickup and a bridge pickup)
- Tune-O-Matic bridge and tailpiece
- Electronics: three-way pickup selector, two volume and two tone pots, input jack, and wiring
- Volume and tone knobs
- Tuning pegs (tuners), strap buttons, and bushings (one carries the earth/ground wire)
- Guitar strings, truss rod cover, and a bag of assorted nuts, bolts, and screws
Before anything else: Do a full parts check the day your kit arrives. If a part is missing or looks damaged, contact [email protected] right away. It is much easier to sort out before you have started building.
Tools you’ll need
None of these are exotic. Most are available at any hardware store.
- A hand screwdriver (never a power drill for the small hardware screws)
- A small drill for pilot holes, a 5/64" bit or similar
- A center punch, to dimple each pilot-hole mark so the bit cannot wander
- Needle-nose pliers, for drawing the pickup wires out through an f-hole
- Two clamps and a scrap of timber to protect the body
- A rubber mallet, in case the bridge and tailpiece bushings are a tight press fit
- Wood glue (PVA or equivalent)
- Stain (your choice of color), grain filler, and an oil finish such as tung oil
- A little denatured alcohol, for raising the grain before you finish and for a final clean
- Sandpaper in a range of grits: 180, 240, 320, and 600
- 0000 (fine) steel wool, clean rags, and some automotive polishing compound
- A soldering iron, solder, and a damp sponge
- A scraper blade or file for cleaning the binding
- A steel ruler (at least 40 cm, so it spans the neck) and, ideally, a string action ruler and feeler gauges for setup
- A small length of fishing line and a spare guitar string (a clever wire-threading trick, explained later)
- Basic safety gear: eye protection, a dust mask for sanding (an N95 is fine) and a particle respirator for finishing (an R95, or an N95 if you use water-based products), and disposable gloves for stain and oil
Section 1: Prepare and dry-fit the neck
Step 1: Inspect the body
Rest the body on the foam packaging and look it over carefully. Check for marks, dents, or leftover glue stains. Because mahogany is an open-grain wood, you may later need to fill the grain. That is normal and covered below.
Step 2: Dry-fit the neck (no glue yet)
This kit has a set-in neck, meaning it glues permanently into the body. First, fit it dry to check the alignment. Angle the heel of the neck into the pocket and lower it in. Do not push it straight down, which can chip the neck edges.
The neck should sit in the pocket with very little side-to-side play. If you find gaps along the sides of the pocket, close them with thin slivers of scrap wood glued to the pocket walls, or fill very small gaps before you finish.
Step 3: Check the scale length and neck angle
With the neck dry-fitted, confirm the scale length reads correctly (about 628 mm on this kit). An easy way to check is to measure from the edge of the nut to the center of the 12th fret and double that figure. A few millimeters either way is fine, since the bridge sits at an angle and the saddles adjust later during intonation.
While everything is in place, check the neck angle too. Lay your steel ruler flat along the fretboard and run it out over the bridge. With the bridge sitting flat, the ruler should pass just above the saddles. If that all lines up, you are ready to glue.
Optional, shaping the headstock: If you want to give the headstock your own shape, do it now, while the neck is still separate and unfinished. Leave at least 15 mm between the last tuning hole and the edge, so there is enough wood to hold the tuner. Draw your design on cardboard or thin scrap, cut that out for a template, and keep the shape simple, because a simple shape done well beats a complicated one done poorly. Clamp the template to the headstock, trace it, then cut just outside the line with a coping saw or jigsaw held vertical, and sand down to the line until it is as smooth as the rest of the neck.
Section 2: Glue the neck in
Step 4: Apply glue and clamp
Put glue on the neck heel and inside the neck pocket, seat the neck, then clamp it. Place a small piece of scrap timber under the body to protect it, and use two clamps to spread the pressure evenly.
Step 5: Clean up any squeeze-out
A little glue may escape as you tighten the clamps, and that is fine. Wipe visible glue from the binding and veneer top with warm water and a rag. If some remains, especially around the binding, light sanding with 240-grit paper will lift it.
Spotting hidden glue: Glue can be hard to see. Lightly mist the body with water as if raising the grain. Any spot that refuses to absorb water is likely leftover glue. Sand it away, but go gently on the veneer top. It is very thin and easy to sand through.
Section 3: Stain the top
This is where your guitar gets its personality. The technique below makes the flame-maple grain really pop using a two-stage stain.
Step 6: Mask off the cavities
Tuck packaging material into the f-holes to stop stain dripping inside, and mask the neck and bridge pickup cavities and the fretboard. It is also worth keeping stain and finish out of the bridge and tailpiece post holes and away from the truss rod.
Step 7: First, a dark base coat to pop the grain
Rub a dark stain (a black or dark brown) firmly into the top, working it into the grain. Let it dry, then sand most of it back off with 240-grit paper. The dark color stays down in the grain lines and accentuates the figure of the wood.
Step 8: Apply your color coat
Now apply your chosen color. In the video, that is a purple. Start with a light wash coat, let it dry, then follow with a stronger coat mixed a little heavier until you reach the depth of color you want. Clean off all dust between coats.
Step 9: Let it dry overnight
Give the stain a full night to cure before moving on to grain filling and finishing.
About the binding: You do not need to mask the binding before staining. Stain often leaks under the tape anyway, so it is cleaner to scrape the binding at the end (Section 4). One exception: inspect the binding first, and if you find any cracks, mask those, because cracks will soak up stain.
Section 4: Grain fill, scrape, and oil finish
Raise the grain first: Before you fill, wipe the back, sides, and neck with a little denatured alcohol (it flashes off quickly) or water. This lifts the fine fibers of the grain. Let it dry, then sand it flat with 240-grit. You only need to do this once, because the grain will not raise again.
Step 10: Grain-fill the back, sides, and neck
Flip the guitar over and apply two coats of grain filler to the back, sides, and back of the neck. Mahogany’s open pores need filling for a level surface. Work the filler into the grain first, then across it, pressing it in with a rag. Give it about ten minutes, then wipe the excess off with a damp rag before it fully hardens. Water-based filler is tidier to clean up. Oil-based penetrates deeper.
Step 11: Sand the filler back
Sand the filler down to the surface of the wood, but not into it, or you will open new pores. Start at 180 grit, move to 240, and finish at 320.
Step 12: Scrape the binding clean
Take your scraper blade, lean it about 10 degrees, and drag it along the binding to remove the finish residue. Line it up with the edge of the guitar and work carefully. It takes patience, but that crisp white line around the body is worth it.
Step 13: Sand to 600 grit and clean
Sand everything to 600 grit, then brush and wipe it down with a damp rag so it is clean and ready for oil.
Step 14: Apply the oil finish
Rub tung oil into the body and neck. Apply a coat, then a second. For the final coat, let the oil sit about 15 minutes, then wipe away any excess while it is still tacky. You are removing what the wood has not absorbed.
Step 15: Steel-wool and polish
Once dry, rub the finish down with steel wool in a circular motion. It will dull the shine, but do not worry. Then work automotive polishing compound in with one rag and buff it up with a second clean rag. The shine comes right back, and any fine scratches disappear. Go over it a couple of times.
Section 5: Install the hardware
Read this first, screws: Always drill a pilot hole before driving a small screw, and always turn hardware screws by hand. A power drill will strip these tiny screws in an instant. Never use one here. Size the bit at about two-thirds the thickness of the screw, and wrap a small flag of masking tape around the bit to mark the depth so you do not go too deep. In soft mahogany, keep the hole on the shallow side. To mark each hole cleanly, stick down a piece of masking tape, mark the spot with a pen (a pencil will not bite on tape), and dimple it with the center punch so the bit starts exactly where you want it.
Step 16: Strap buttons
On a single-cutaway guitar, one strap button goes at the bottom of the body and one on the upper bout. Find the center line with a square, drill a pilot hole (a 5/64" bit or similar), fit the small rubber pad under the button, and drive the screw by hand.
Step 17: Bushings (mind the earth wire)
You will have four bushings. One, nearest the f-hole, carries the earth (ground) wire. Before fitting it, find the black PVC-coated earth wire in your parts, strip and feather the end, thread it through the small hole beside the bushing hole, and seat the bushing so the wire is pressed hard against it. It helps to bend a small hook in the bare end first, so it stays at the top of the hole and holds firm against the bushing. This is what grounds your guitar, so do not skip it.
The bushings can be a tight press fit, so tap them home gently with a rubber mallet if they resist, then screw each post into its bushing. Fit the bridge over its posts now, but leave the tailpiece off until the strings are on, since it will not stay put until the strings hold it down.
Step 18: Tuning pegs
Drop a washer over each post, then the bushing, and fit the tuners from the back with their mounting holes facing the body. Hand-tighten them just enough to hold position. Use a steel ruler to check they are all aligned, mark and drill the small pilot holes, drive the screws by hand, then snug the top nuts with a socket. If the tuners came with a protective film on the back, press a strip of masking tape firmly onto it and peel the tape and film away together in one go.
Section 6: Soldering basics
If you have never soldered, do not be intimidated. A few simple habits make it easy, and it is worth practicing on a spare offcut of wire before you touch the guitar’s parts.
- Keep the tip tinned (coated with a little solder). This stops it oxidizing so solder flows well.
- Tin your wires and the component lugs too.
- Solder is not glue. It is about transferring heat. Hold the iron on the lug and wire for a moment to heat them first, then feed in a small amount of solder to make the joint.
- Wipe the tip on a damp sponge now and then to keep it clean.
- Once a joint has cooled, tug the wire gently to be sure it is solid. These connections get dragged through the body later, so they need to hold.
Safety: A soldering iron gets extremely hot, anywhere from roughly 390 to 900 degrees F, and solder itself does not melt until about 185 C (365 F). Rest it in its stand every time you set it down, work in a ventilated space, and keep it away from your finished body.
Section 7: Wire the electronics
This kit is a classic dual-humbucker layout: two volume pots, two tone pots, a three-way selector, and an input jack. Work calmly, one connection at a time.
Step 19: Thread the pickup selector with the fishing-line trick
Getting the selector switch through its hole is the fiddliest part, so here is the trick from the video: tie fishing line to the ball end of a spare guitar string, protect the hole edges with tape, and feed the string through the channel. Tie the fishing line to the switch, keeping the knot well above the switch so it pulls straight up rather than sideways, then gently draw it into place. Thumb-tighten it for now.
Step 20: Lay out your pots
Arrange the four pots in order: neck volume, neck tone, bridge volume, bridge tone. Laying them out in a template first makes the wiring far easier to follow.
Step 21: Connect the pickups
First get the pickup leads where you can reach them. Feed each pickup’s wires down through the channel toward the lower f-hole, then reach in with the needle-nose pliers and draw them out through the f-hole. The bridge pickup is the one with the deeper surround.
The neck pickup’s hot wire (red) goes to the input lug of the neck volume pot. With the pot facing you, that is the lug on the left. Ground the pickup to the back of that same pot. Repeat the pattern for the bridge pickup and its volume pot.
Step 22: Attach the earth wire
Connect the earth wire coming from the bridge bushing to the ground. This completes the ground circuit that keeps your guitar quiet and hum-free.
Step 23: Fit the knobs and input jack
Press on the volume and tone knobs. For the input jack, thread it through using the same fishing-line-and-string method, keep the inner nut in place, set the plate over it, and screw it down.
Section 8: Final setup
The setup is what turns an assembled guitar into one that plays beautifully. Think of these numbers as starting points. You can revisit them once you have played the guitar for a while and know your preferences.
Tune up first
Always bring the guitar up to pitch before adjusting anything. The neck needs its normal string tension on it before you measure or change a thing.
Neck relief (truss rod)
Hold down the first fret and the last fret at the same time, then tap the string at the 12th fret. A tiny gap is what you want. To adjust, remove the truss rod cover screw and use the Allen key from your kit:
- Turn counterclockwise to loosen the rod and add relief (more forward bow).
- Turn clockwise to tighten the rod and flatten the neck.
Make small changes, about an eighth of a turn at a time, and re-check after each one. Never force large adjustments.
Action (string height)
Action is personal, but a good starting point measured at the 12th fret is 2.4 mm on the low E and 1.6 mm on the high E. Measure from the top of the fret to the underside of the string. Adjust at the bridge: turn the posts to raise or lower the whole bridge. Tightening lowers the action, loosening raises it.
Intonation
Intonation means the guitar is in tune with itself. Compare the open string to the note at the 12th fret (one octave up) with the same picking force:
- If the 12th-fret note is sharp, lengthen the string: turn the saddle screw counterclockwise to move the saddle back.
- If it is flat, shorten the string: move the saddle forward.
Work across all six strings and fine-tune until each is right. New strings settle as they stretch, so re-check after playing a while.
Pickup height
A good starting point is about 2.4 mm of clearance on the bass side and 2 mm on the treble side. Hold the string down at the last fret and measure from the top of the pole piece to the underside of the string, then adjust the pickup’s mounting screws up or down. This one is very much down to how the guitar sounds to your ear.
| Setting | Starting point |
|---|---|
| Action at 12th fret | 2.4 mm low E / 1.6 mm high E |
| Pickup height | 2.4 mm bass side / 2.0 mm treble side |
| Truss rod | 1/8 turn at a time, counterclockwise adds relief |
| Scale length | ~628 mm |
| Nut width | 42 mm |
Section 9: Test your guitar
Plug in and check each pickup position works: bridge, middle (both pickups together), and neck.
Then run a quick noise test: put the selector in the middle position, turn both volumes to 10, and take your hands off the guitar. You should hear no hum. If you do, a ground connection has likely come loose. Check the black earth wires that link your components to the bridge.
Finally, play every note up the neck on each string, listening for dead notes or fret buzz. If you find any, put the guitar back on the bench and re-check your action and neck relief.
Pro tips
- Pro tip: Dry-fitting first is your safety net. It lets you confirm everything seats correctly before glue makes the neck join permanent.
- Pro tip: Patience between coats is everything. Clean the guitar thoroughly and remove all dust before each new coat. Trapped dust is the number-one thing that ruins an otherwise beautiful finish.
- Pro tip: When pulling wires to the pots, fishing line will not grip well, so switch to cotton thread, a very fine fishing line, or a short length of flexible tubing that fits snugly over the pot shaft. Follow your kit’s own wiring diagram exactly, and do not improvise a different layout.
- Pro tip: If you want to go deeper on finishing, the book Guitar Finishing Step-by-Step by Dan Erlewine and Don MacRostie is a great reference.
- Pro tip: Setup is not one-and-done. Come back and refine relief, action, and intonation after the guitar has settled and you have learned what feels good under your hands.
When you get stuck
Take your time, and do not force anything. Questions about a step? Comment below and we will help you right here. If a part looks wrong, is missing, or arrived damaged, email our support team at [email protected] with the email address you used for your purchase, your order number, and a photo, and the team will get you sorted out quickly. When your build is done, share it in the DIY Guitars category so the community can see what you made.
You just built a real, playable guitar with your own hands, from a bare body to a set-up instrument. Play it, enjoy it, and do not be surprised if you start eyeing your next kit.
Watch the full build series: YouTube playlist. Kit page: Semi-Hollow Single-Cutaway Electric Guitar Kit.