You are about to take a bare guitar body and neck and turn them into a smooth, glossy, finished instrument, and you do not need a spray booth or years of experience to do it. This guide covers the whole finishing journey, from your first pass of sandpaper through priming, color, clear coats, and final polishing, then the bolt-on neck install and the acoustic-electric bridge. Take your time, because good finishing is mostly patience and thin, even coats. The finishing process in this guide applies to any Guitar Kit World kit, while the bridge steps are specific to the acoustic-electric semi-hollow kit.
Difficulty: Advanced
Build time: A multi-day finishing project (spraying plus cure times)
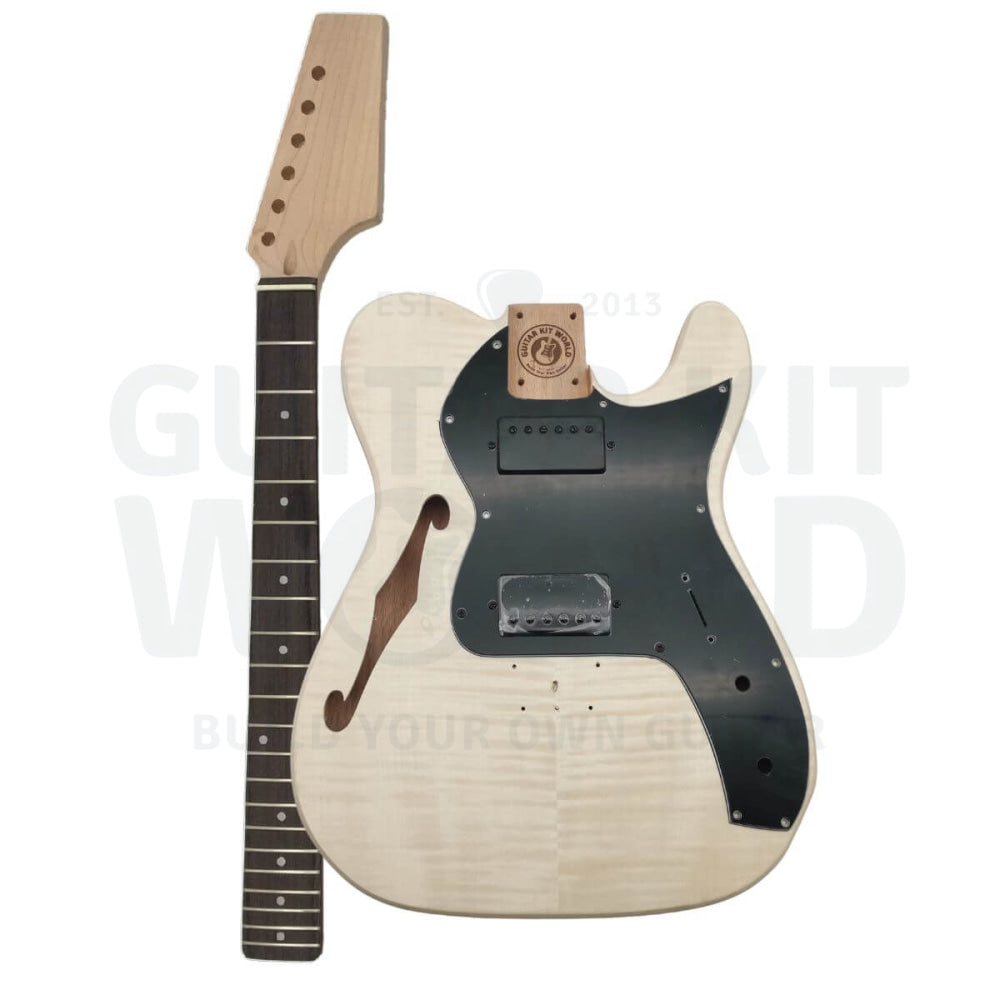
Kit: Acoustic-Electric Semi-Hollow Body Kits
Tools you’ll need
Sandpaper and abrasives:
- 280, 320, and 360-grit sandpaper: initial prep sanding to remove surface imperfections.
- 400-grit sandpaper: final prep sanding to prepare the bare wood for primer.
- 600 to 800-grit sandpaper: giving the cured primer a matte finish before color.
- 0000 fine grade steel wool: polishing frets or buffing out the final layers of a finish.
Finishing materials:
- Primer: applied in coats to create an even, scratch-free base.
- Color finish: applied in thin coats to color the guitar without deadening resonance.
- Wipe-on polyurethane: used as the clear coat to seal, protect, and polish the final finish.
- Wood grain filler (for open-grain timber): fills the natural pores in woods like mahogany or ash for a perfectly flat surface.
- Finishing supplies: stains, oils, nitrocellulose, or polyurethane to color and seal the body and neck.
- Denatured alcohol (or degreaser): wiping down bare wood before finishing to remove natural oils, sweat, and sanding dust.
Hand tools:
- Phillips screwdrivers: installing hardware such as tuning pegs, pickguards, pickups, and the bridge.
- Power drill: drilling pilot holes for screws (strap buttons, pickguards) to prevent the wood from splitting.
- Clamp or clamping system: applying tight, even pressure to wood joints (like a set neck) while the glue cures.
- Small paintbrush: applying glue evenly in neck pockets or touching up finishes in tight, hard-to-reach areas.
- Measuring tool: measuring the exact 25.5-inch scale length for bridge placement.
Consumables and safety:
- Water or moisture: applied directly to dents to swell the wood cells so they can be sanded flat.
- Disposable gloves: protecting your hands from sticky wood glue, stains, solvents, and finishes.
- Titebond, PVA, or similar wood glue: attaching the neck to the body (on a set-neck kit) or gluing wood shims.
- Painters masking tape: protecting areas you do not want painted, such as the fretboard, neck joint, or body binding.
- Clean rags and paper towels: wiping off excess glue, applying stains or oil, and keeping your workspace clean.
- Container for storing finishing supplies: safely storing and mixing custom stains, solvents, or small hardware pieces.
- Fishing wire or plastic-coated wire: tying around potentiometers to fish the wiring harness through the F-holes.
- 9-volt battery (not included): powering the active electronics or equalizer if your kit includes an active preamp.
- N95 mask: protecting you from dust and harmful paint fumes.
Section 1: Sanding
Watch: sanding the guitar (part 1) · Watch: sanding the guitar (part 2)
Before you sand, look over the body and neck for scratches or dents. A minor dent can often be fixed by placing a drop of water on it so the wood cells swell back into place, then sanding it flat once dry.
The body
- Start with 280-grit sandpaper wrapped around a sanding block (cork, hardwood, or even a sponge).
- Gently sand through the grain.
- Move up through 320-grit, 360-grit, and finally 400-grit.
- Sand the sides and repeat the same grit sequence (you do not need to worry about sanding through the grain on the sides).
- Once you are happy with the surface, wipe the sanded areas clean with denatured alcohol and a clean cloth.
Pro tip: For hard-to-reach areas, wrap your sandpaper around an eraser or anything small and rectangular.
Pro tip: For larger curved parts, wrap your sandpaper around a bottle or a similar round object.
The neck
- Check for dents: Feel the back of the neck. If you find a dent, place a drop of water on it so the wood swells back into place.
- Tape the fretboard: Cover the entire front of the neck (where the metal frets are) with blue painter’s tape to protect it.
- First sand (280, 320, 360-grit): Wrap 280-grit sandpaper around a sponge and sand up and down, following the grain, until the rough spots are gone.
- Final sand (400-grit): Repeat the up-and-down sanding with 400-grit paper to make it extra smooth. Stop here. Sanding finer than 400-grit leaves the surface too shiny for the finish to stick.
- Wipe clean: Wipe away all the leftover dust with a clean, dry cloth so you have a perfect surface for painting.
Section 2: Wrap binding (getting ready for priming)
Watch: masking the binding (part 1) · Watch: masking the binding (part 2) · Watch: masking the binding (part 3)
The body
- Clean the edges and neck pockets: Wipe the binding down with a clean, dry cloth. Tape will not stick if there is leftover sanding dust on the surface.
- Get the right tape: Protect your binding using flexible pinstriping tape, tightly sealed blue painter’s tape, brush-on liquid masking fluid, or by skipping the tape entirely and carefully scraping the paint off the binding later. Vinyl fineline tape or green automotive masking tape also work well. Avoid standard paper masking tape, because liquid primer bleeds right underneath it.
- Tape the strip: Slowly unroll the tape and apply it exactly over the binding strip all the way around the body. Take your time, especially around the tight curves of the horns.
- Seal the edges: Run your fingernail, a guitar pick, or a plastic card firmly along the edge of the tape. Pressing it down hard creates a tight seal so primer cannot sneak underneath.
- Trim the excess: If your tape overlaps onto the bare wood, carefully score the very edge with a sharp craft knife and peel away the excess. You want the wood fully exposed for the primer and the binding fully covered.
Note: Plug small holes with toothpicks or expanding foam earplugs to keep primer out of your hardware mounts. Cover large openings like the pickup routes and neck pocket completely and tightly with the same tape you are using here, so everything still fits perfectly afterward.
Note on handling the body: Screw a scrap piece of wood into the neck pocket to use as a handle, so you never have to touch the body once you start spraying.
Pro tip: Take your time when masking so you avoid bumps or folds as you lay the tape down.
Pro tip: Take your time when trimming the excess tape.
The neck
- Clean up: Wipe the fretboard completely free of dust so your tape sticks.
- Tape the top: Cover the entire front of the fretboard (where the metal frets are) with tape.
- Seal it: Press the tape down firmly along the edges with your fingernail to create a tight, paint-proof seal.
- Trim excess: If any tape folds over onto the back of the neck, carefully cut it away with a craft knife so the back is fully exposed for your primer.
Note on handling the neck: Use a finishing stick, or screw a scrap-wood handle directly into the heel’s mounting holes, to keep your hands off a bolt-on neck while finishing. You can also suspend the neck vertically by looping a heavy-gauge wire through a taped-off tuning peg hole for easy all-around spraying.
Pro tip: Take your time when trimming the excess tape.
Section 3: Applying the first coat of primer
- Choose the right environment: Avoid spraying outside on windy days, because the wind will blow dirt and grit straight into your wet paint. Find a well-protected, well-ventilated spot.
- Prep your spray can: Shake the primer can vigorously. You must hear the mixing ball rattling inside. If you do not hear it, there is an issue with the can.
- Wear a mask: Always put on a protective breathing mask before you begin spraying any paint or primer.
- Check your distance and angle: Hold the spray can about 30 cm away from the body, keeping your hand at a slight angle.
- Spray in sections: Work methodically, spraying in straight, overlapping strips from the top and working down. Do the top (front) first, then turn the guitar to do the sides, and finally the back.
- Let it dry: Do not rush. Once the entire body is covered in a light first coat, let it dry for about 45 minutes before applying your second coat.
Pro tip: Clean the nozzle with boiling water. Dip the nozzle in boiling water before use to prevent sputtering, and always do a couple of quick test sprays on a piece of cardboard to clear it out before pointing it at your guitar.
Pro tip: Light coats are key. Do not try to cover the bare wood completely on the first pass. Heavy, thick coats cause the paint to drip and run.
Pro tip: Trust the process. You will not see great coverage on coat one. By your second or third light coat, the wood will be fully covered and smooth.
Section 4: Applying the second coat of primer
- Timing: Apply the second coat about 45 minutes after the first coat has dried.
- The goal: Aim for decent, even coverage that fills and levels the natural pores in the wood. The plan is to complete the priming phase in just three coats.
- Safety first: Always put your mask back on before spraying.
- Technique: Keep using very light coats to eliminate any risk of running or dripping. You will start to see much better coverage during this pass.
- Coat progression: Each coat should be slightly heavier than the last. The second coat is a bit heavier than the first, and the upcoming third coat will be slightly heavier than the second.
Pro tip: For the best results, each coat you spray should be slightly thicker than the last. Coat three gets the most material, giving you a solid, even foundation for sanding.
Section 5: Applying the final coat of primer
- Wait 45 minutes: Make sure your second coat has had about 45 minutes to dry before starting this step.
- Wear your mask: Always put your protective breathing mask back on before spraying.
- Spray the third coat: Apply the primer evenly over the entire body. Make this coat slightly thicker than your second coat.
- Let it cure: Set the guitar in a safe, well-ventilated spot and leave it alone for 24 to 48 hours so the primer can fully harden and cure.
Pro tip: Each coat should be slightly thicker than the last. Coat three gets the most material, giving you a solid, even foundation for sanding.
Pro tip: Do not rush the cure time. Even if the primer feels dry to the touch after a few hours, do not start sanding. Waiting the full 24 to 48 hours ensures the primer has completely hardened, which keeps it from gumming up your sandpaper later.
Section 6: Prepping the cured primer for color
Watch: prepping the cured primer (part 1) · Watch: prepping the cured primer (part 2)
- Let the primer cure: Make sure you have waited the full 24 to 48 hours for the primer to completely harden.
- Remove the temporary handle and masking tape: Carefully peel away the painter’s tape you applied earlier to protect the binding.
- Inspect the binding: Check the edges where the tape used to be. It is very common for a tiny bit of liquid primer to sneak underneath the tape.
- Scrape the binding: If you see any primer bleed on the binding, gently scrape it off to restore a clean, sharp edge before you move on to sanding.
Pro tip: Never sand a soft finish. If the primer has not fully cured, it will still be soft, and sanding soft primer instantly clogs your sandpaper and can ruin your prep work. Patience pays off.
Pro tip: Expect a little bleed-through. Do not panic if you see primer on the binding after peeling off the tape. A little product seeping under the masking tape is inevitable, and it is an easy fix with a little scraping.
Section 7: How to level sand your primer
Watch: level sanding the primer (part 1) · Watch: level sanding the primer (part 2) · Watch: level sanding the primer (part 3)
- Switch to a soft sanding block: Unlike bare wood, which needs a hard block to aggressively level the surface, primer needs a softer touch. Attach 600 to 800-grit sandpaper to a soft sanding block. It is much less aggressive and easier to work with at this stage.
- Begin sanding the body: Lay the guitar down and start sanding the surface with normal strokes. Be very careful as you approach the edges so you do not sand through the primer.
- Check the light for orange peel: Pick up the guitar and hold it at an angle under a light source. You will likely notice a texture that looks like an orange peel, a mix of shiny areas and matte areas.
- Target the shiny areas: The shiny spots are low areas the sandpaper has not touched yet. Keep sanding over them to level the surface.
- Sand to a uniform matte finish: Keep sanding and checking in the light until all the shiny spots are gone. Once the entire surface has a uniform, flat, matte appearance, the body is level and ready for color coats.
Pro tip: Understand the why. A primer coat’s job is to seal the bare wood, level the finish, and fill tiny pores. Your job right now is simply to level that primer, not to remove it.
Pro tip: Do not over-polish. Never sand primer past 800 grit. If you make the surface too smooth or shiny, the paint will not have anything to grip, and your color coats will not adhere.
Pro tip: Unclog your paper. Check your sandpaper frequently and clear the clogs. Clogged paper drags clumps of primer across the body and creates deep, unwanted scratches.
Pro tip: Mind the edges. The primer is thinnest at the edges and contours, so use a light touch there to avoid sanding back to bare wood.
Section 8: Applying the first color
- Choose a sheltered environment: Find a secluded painting spot completely protected from the wind.
- Put on your safety gear: Securely fit your painting mask or respirator before handling the paint.
- Position the spray can: Hold the can at a consistent angle and distance from the body, mirroring the technique you used for the primer.
- Spray the first coat: Work from the top of the body down to the bottom. Keep this first coat very light.
- Let the paint dry: Move the guitar inside, away from wind and dust, and let it hang undisturbed for 45 minutes.
- Apply additional coats: Repeat the spray-and-rest process for a total of 3 to 5 coats, depending on coverage. Build the color up gradually, keeping every coat light.
Pro tip: Keep every color coat thin. On this semi-hollow body, thin coats matter even more, because they preserve the resonant, acoustic qualities of the wood.
Pro tip: Wind is the enemy. It makes the spray pattern hard to control and carries airborne grit straight into your wet paint.
Pro tip: Stick to forgiving colors. For a first guitar, choose white, off-white, or pastel colors. Dark colors act like a mirror and loudly highlight any underlying scratches or leveling issues.
Pro tip: Build the paint slowly. Several light, thin coats prevent drips and runs and look far more professional than one or two heavy coats.
Section 9: Applying the second color
This is a second color pass over the first, using the exact same technique as Section 8.
- Choose a sheltered environment: Find a secluded painting spot completely protected from the wind.
- Put on your safety gear: Securely fit your painting mask or respirator before handling the paint.
- Position the spray can: Hold the can at a consistent angle and distance from the body, mirroring the technique you used for the primer.
- Spray the first coat: Work from the top of the body down to the bottom. Keep this initial coat very light.
- Let the paint dry: Move the guitar inside, away from wind and dust, and let it hang undisturbed for 45 minutes.
- Apply additional coats: Repeat the spray-and-rest process for a total of 3 to 5 coats, depending on coverage. Build the color up with every pass, keeping each coat light.
Section 10: Level sanding the color coat for clear gloss
Watch: level sanding the color coat (part 1) · Watch: level sanding the color coat (part 2)
Tools for this step
| Tool | Purpose |
|---|---|
| 600-grit sandpaper | The primary paper for leveling the color coat and removing the orange-peel texture. It leaves just enough grip for the clear coat to adhere. |
| 800 to 1000-grit sandpaper (optional) | A safer, less aggressive option if you are worried about sanding through the paint, though it may let the clear coat adhere less effectively. |
- Let the color coat fully cure: Wait until the paint is entirely hardened. In cold weather (like winter), this can take up to two weeks or more.
- Inspect the surface in the light: Hold the guitar up to a light source at an angle to look for the orange-peel effect (a dimpled texture with high shiny spots and low shaded spots).
- Begin lightly sanding: Using 600-grit sandpaper, gently sand the body to knock down the high, shiny areas. Let the sandpaper do the work rather than applying heavy pressure.
- Regularly clean your sandpaper: Stop often to unclog your paper so built-up paint dust does not drag across and scratch your finish.
- Avoid the edges completely: Keep your sandpaper away from the sharp edges and contours.
- Stop when evenly dull: Sand just until the shiny spots are gone and the surface looks uniformly dull. You do not need to remove every microscopic trace of orange peel.
Pro tip: Respect the weather. Temperature drastically affects curing times. If you sand paint that is still soft, it will clog your paper, deeply scratch the guitar, and may force you to start the painting over.
Pro tip: Do not over-sand. It is tempting to sand the color coat flawlessly smooth, but resist. If it is too smooth, your clear coats will not have enough texture to stick to.
Pro tip: Fear the sand-through. A sand-through means you went completely through the color coat and exposed the primer. The paint is thinnest at the edges, so those are high-risk zones. Avoiding the edges is your best defense against touch-ups or a total repaint.
Pro tip: Understand the clear coat’s job. You do not need absolute perfection here. The clear coat smooths minor remaining imperfections while adding the final glossy protection, so let it do the heavy lifting for the final shine.
Section 11: Spraying clear coats
Tools for this step
| Tool | Purpose |
|---|---|
| Clear coat spray | Provides a protective, glossy finish over your color coats, sealing the paint and protecting the guitar from wear. |
- Position the spray can: Hold the can at the same distance from the body as you did for your color coats, with the nozzle at a 45-degree angle to the surface.
- Spray in overlapping lines: Spray across the body in smooth, straight lines. On each new pass, aim to cover exactly half of the previous line.
- Keep the coat light: Apply a thin layer of clear coat. Do not try to flood the surface with a heavy, thick layer.
- Repeat for multiple coats: Plan for a total of 3 to 5 light coats, letting the clear coat dry between each application.
Pro tip: The 50 percent overlap rule. Half-covering your previous spray line is the secret to a perfectly even finish, with no dry, patchy spots between strokes.
Pro tip: Beware of runs. Clear coat is notorious for running and dripping if applied too heavily, and runs create a lot of extra sanding work to fix. Many light coats are vastly superior to a few thick ones.
Section 12: Final sanding after clear coat (wet sanding)
Watch: wet sanding the clear coat
Tools for this step
| Tool | Purpose |
|---|---|
| Wet and dry sandpaper | To level the clear coat. You will need grits from 600 or 800 (for heavy runs) all the way up to 1500 or 2000. |
| Flexible sanding block | To wrap your sandpaper around. A flexible block follows the gentle slopes of the body better than a hard block. |
| Rubber mat (or gym flooring) | To place on your workbench so the guitar does not slip around while you sand. |
| Spray bottle with water | To continuously lubricate the guitar surface and the sandpaper. |
| Sound hole protection | Masking tape or rags to block the sound hole and keep water off the unsealed raw timber inside. |
Verify the clear coat is fully cured first. Check the instructions on your clear coat can. Some finishes cure in two weeks, while others take up to 30 days. Do not begin sanding until it is completely rock hard.
- Secure and protect the guitar: Lay down your rubber mat and place the guitar on top. Thoroughly protect the sound hole so no water can seep into the raw, unsealed wood inside the body.
- Prepare your sandpaper: Wrap a piece of wet/dry sandpaper (ideally soaked overnight) around your flexible sanding block. If you have visible drips or runs, start with 600 or 800-grit. If your finish is relatively smooth, start higher, around 1000-grit.
- Lubricate and sand lightly: Spray water onto the body. Keep your block moving constantly with light pressure. Do not stay in one spot too long.
- Wipe and inspect in the light: Periodically wipe the watery slurry off and hold the body up to a good light source. Look for the orange-peel effect to identify high and low spots.
- Work your way up the grits: Once the finish is flat and the orange peel is gone, move up to your next, finer grit. Repeat until you reach 1500 or 2000-grit, leaving a perfectly level, semi-matte surface ready for the final polish.
Pro tip: Shop at automotive stores. If you cannot find ultra-fine wet/dry sandpaper (1500 to 2000-grit) at your local hardware store, head to an auto parts store. They regularly stock these extremely fine grits for car detailing.
Pro tip: Soak your paper overnight. Letting wet/dry sandpaper soak in water overnight softens the paper backing, making it more pliable and reducing the risk of scratching your finish.
Pro tip: Keep the moisture up. Never wet-sand dry. Keep your spray bottle handy so the surface stays lubricated to float away paint dust and prevent deep scratches.
Pro tip: Steer clear of the curves. Just like the earlier steps, the edges and curves are the danger zones. Avoid sanding them directly to prevent heartbreaking sand-throughs.
Section 13: Final smoothing with steel wool
Tools for this step
| Tool | Purpose |
|---|---|
| Super fine grade steel wool | To gently buff out minor scratches left by the wet/dry sandpaper, leaving a smooth, uniform matte finish. You can usually find it at a craft or hardware store. |
- Grab your steel wool: Take a pad of super fine grade steel wool.
- Buff in a circular motion: Begin gently rubbing the steel wool across the dried clear coat using small, overlapping circular motions.
- Keep it moving: Continuously move the steel wool across the surface. Do not dwell in one spot too long.
- Remove the minor scratches: Continue until the surface has lost its varied sheen and any tiny scratches from your 2000-grit sandpaper have vanished.
- Choose your final look: Admire the smooth, matte surface you have created. From here you make a personal choice: leave the guitar as it is for a sleek matte finish, or move on to a buffer and polishing compounds for a high-gloss, mirror-like shine.
Pro tip: Forget the wood grain. Earlier, when sanding bare wood, you always sanded with the grain. Here you are sanding paint and clear coat, not wood, so grain direction no longer matters, which is why circular motions are effective and perfectly safe.
Pro tip: Matte is a valid choice. Do not feel pressured to polish to a high gloss. A fully leveled, uniform matte finish is a popular and completely acceptable final look for a custom guitar.
Section 14: Gloss finish polishing
Tools for this step
| Tool | Purpose |
|---|---|
| Automotive polish | To remove the final microscopic scratches left by the 2000-grit sandpaper, leveling the surface into a high-gloss reflection. |
| Clean cloth | To wipe away the polish and buff the surface to a shine by hand. |
| Power buffer (optional) | A motorized tool with a buffing pad to speed up polishing and save you some elbow grease. |
- Apply the polish: Squeeze a standard amount of automotive polish directly onto the body.
- Buff the surface: Using a clean cloth or a power buffer, work the polish into the finish.
- Inspect the shine: Wipe away any excess and hold the guitar at an angle toward a light source. You should immediately see a reflective, glossy finish starting to emerge.
- Repeat across the body: Apply the same technique to the rest of the guitar, working through the front, back, sides, and curves until the whole instrument shines.
Pro tip: The science of the shine. A glossy finish is simply the result of a perfectly level surface. Polishing levels out the last of the tiny scratches from your fine sanding, letting light reflect perfectly evenly.
Pro tip: Car polish works great. You do not need expensive, specialty guitar polishes. Standard automotive polish is highly effective and widely available.
Pro tip: The matte advantage. This whole step is optional. If you keep the matte finish from the previous step, you get the bonus of a guitar that hides messy fingerprints while you play.
This manual continues in the next post below (bridge installation and final steps).